Gmail email forwarding
Set up a forwarding address
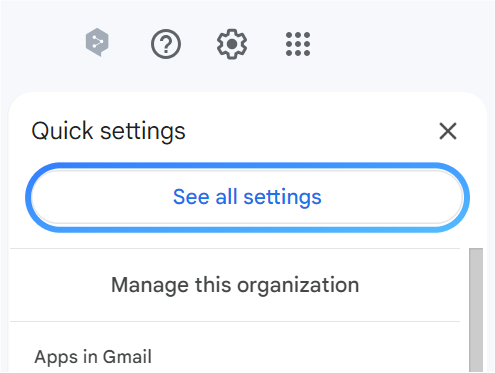
In the top right, click See all settings
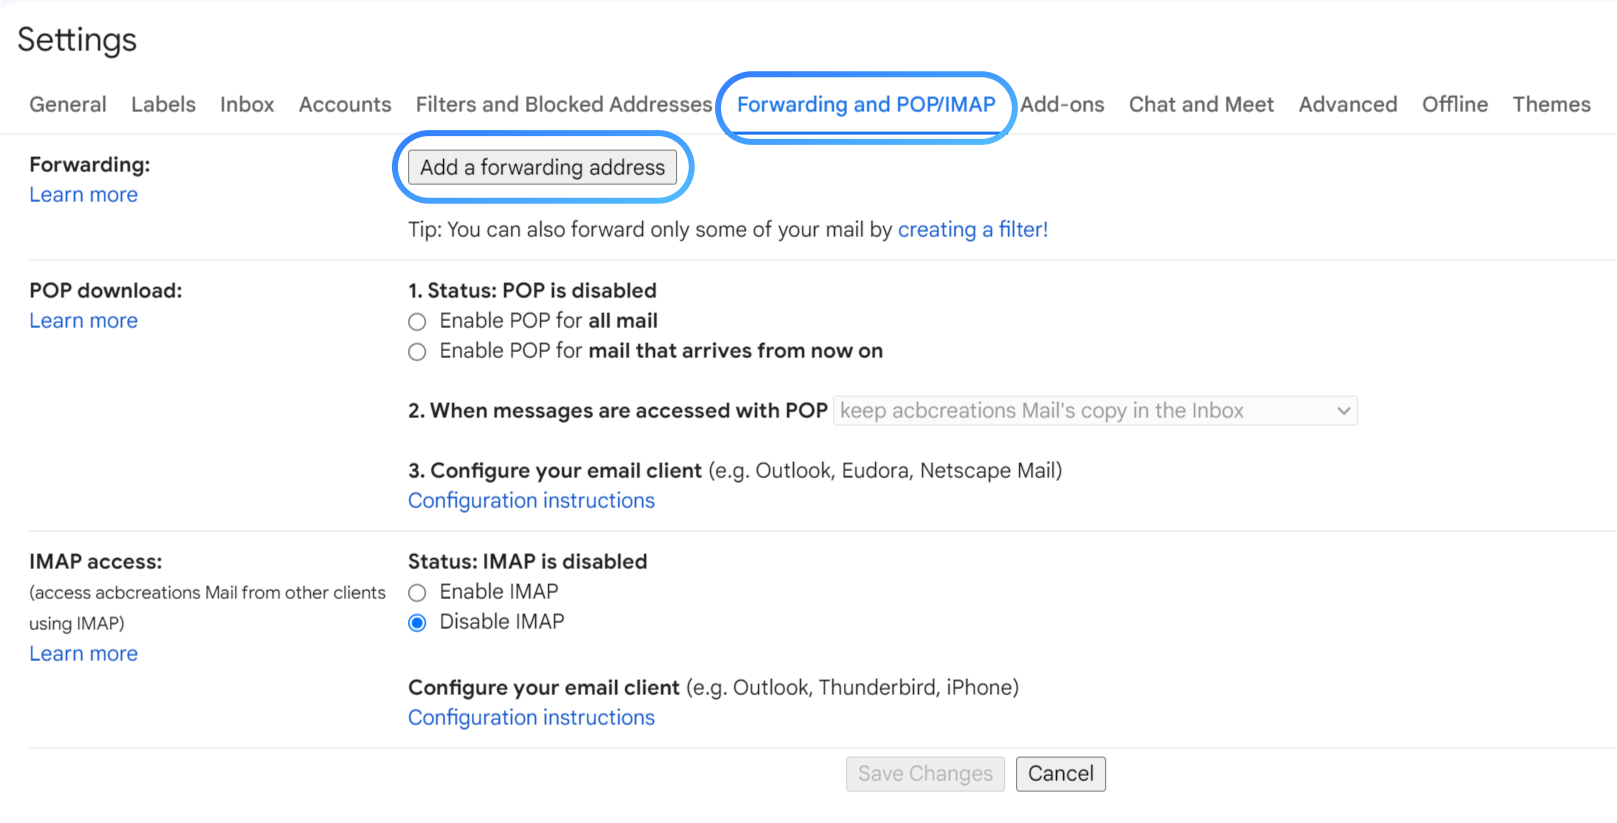
Click the tab Forwarding and POP/IMAP and then click Add a forwarding address
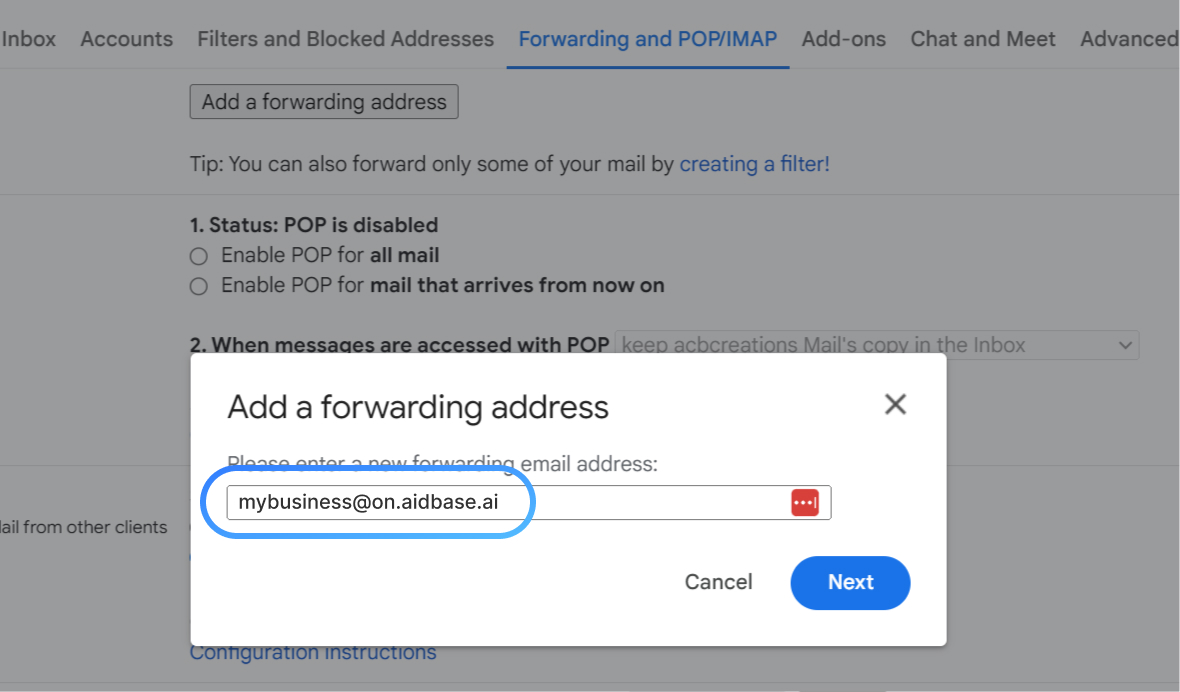
Enter the email address you copied from the Aidbase Email Inbox settings and click Next and then Proceed.
In most cases, Gmail will send a verification email to verify this forwarding address.
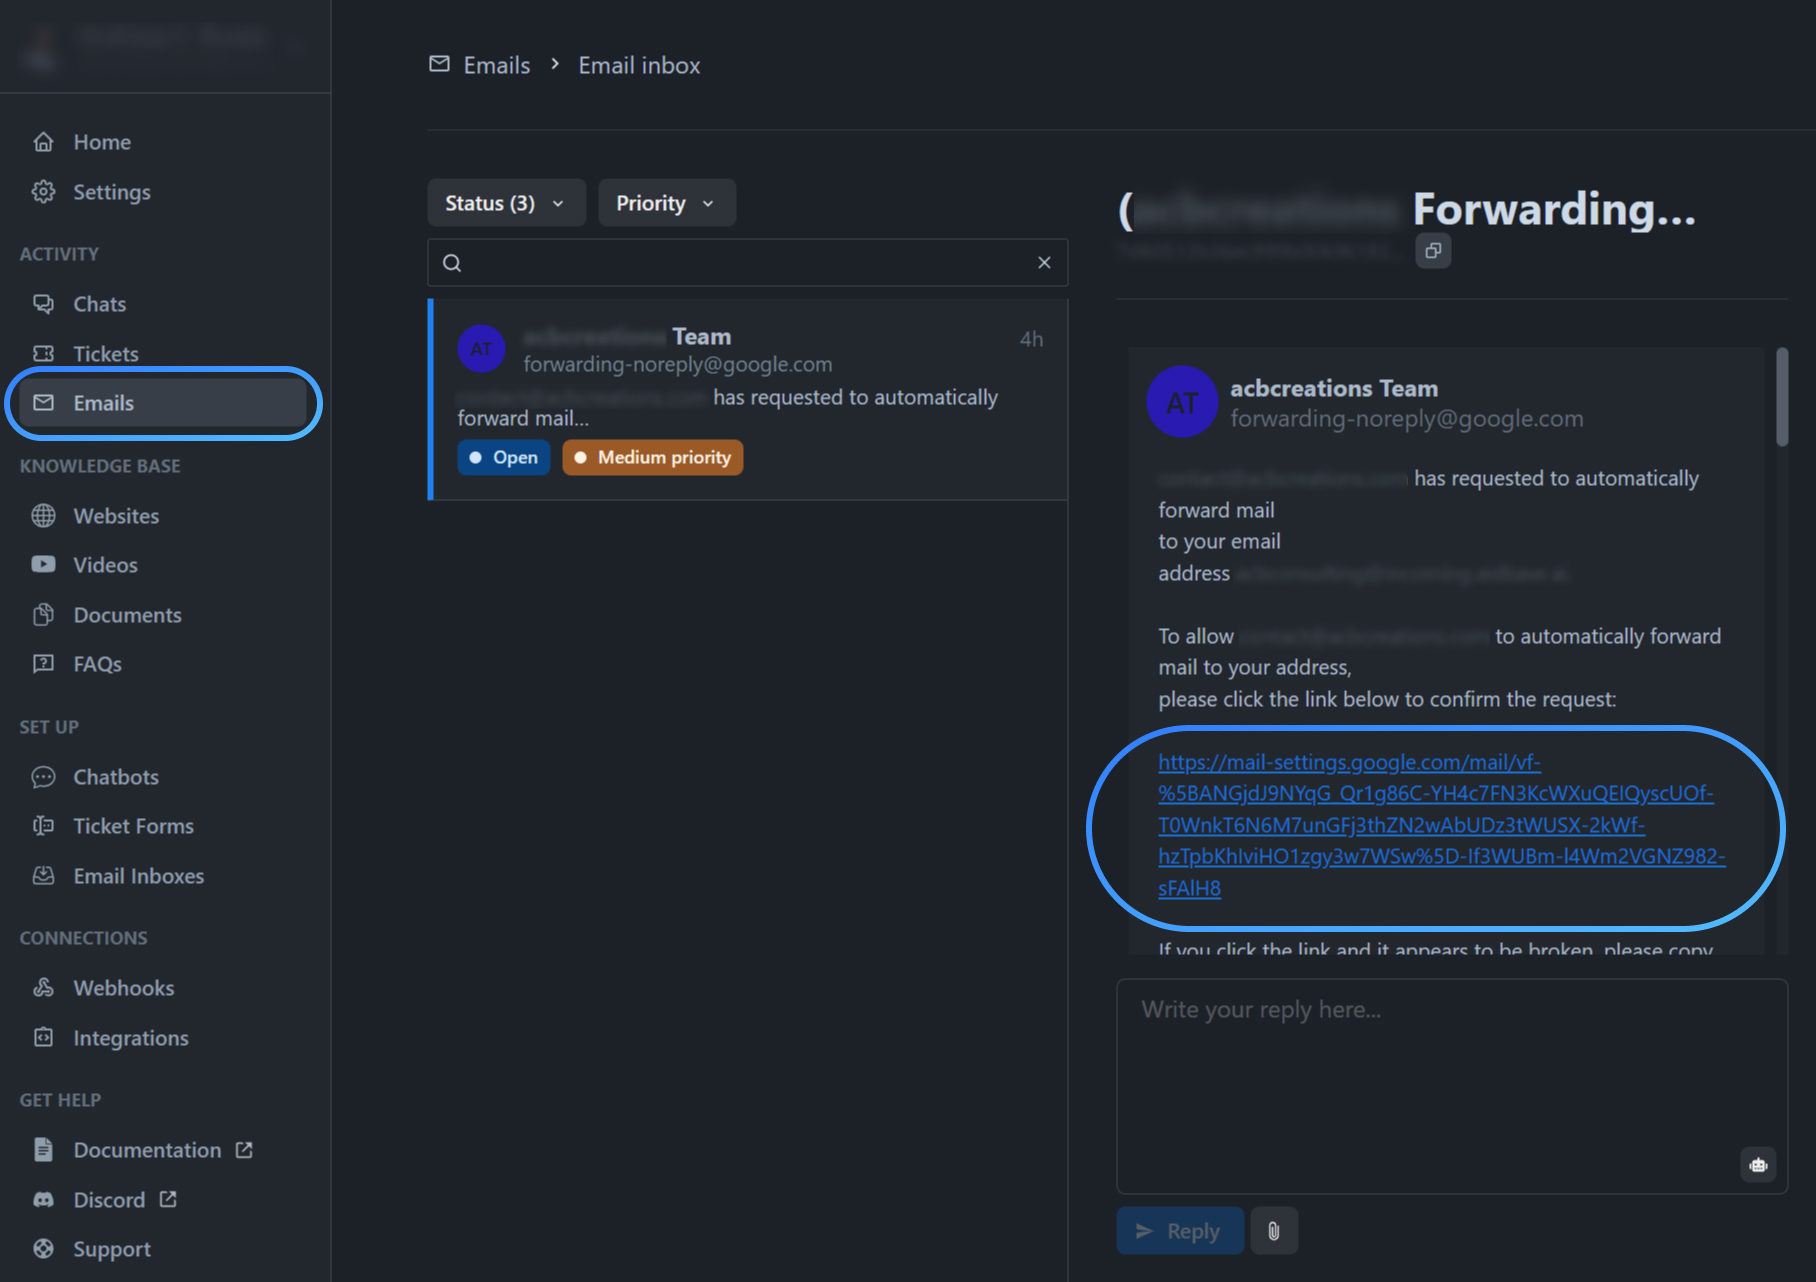
Go back to Aidbase and click Emails from the left menu.
In your newly created inbox, you should recieve a confirmation email from Gmail.
Click the verification link in this email.
Set up a filter
To make sure that all emails are forwarded to Aidbase, we need to create a filter.
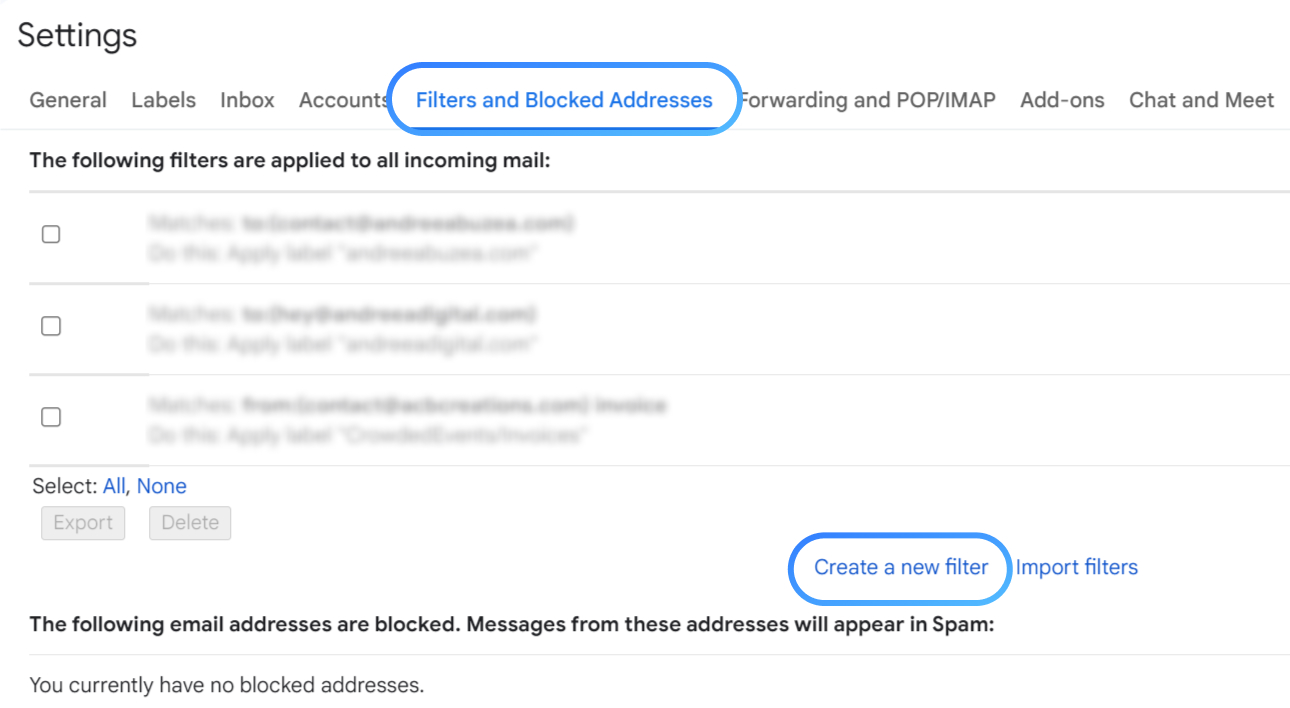
In the top right, click See all settings and then click the tab Filters and Blocked Addresses and then click Create a new filter.
Then click Create a new filter.
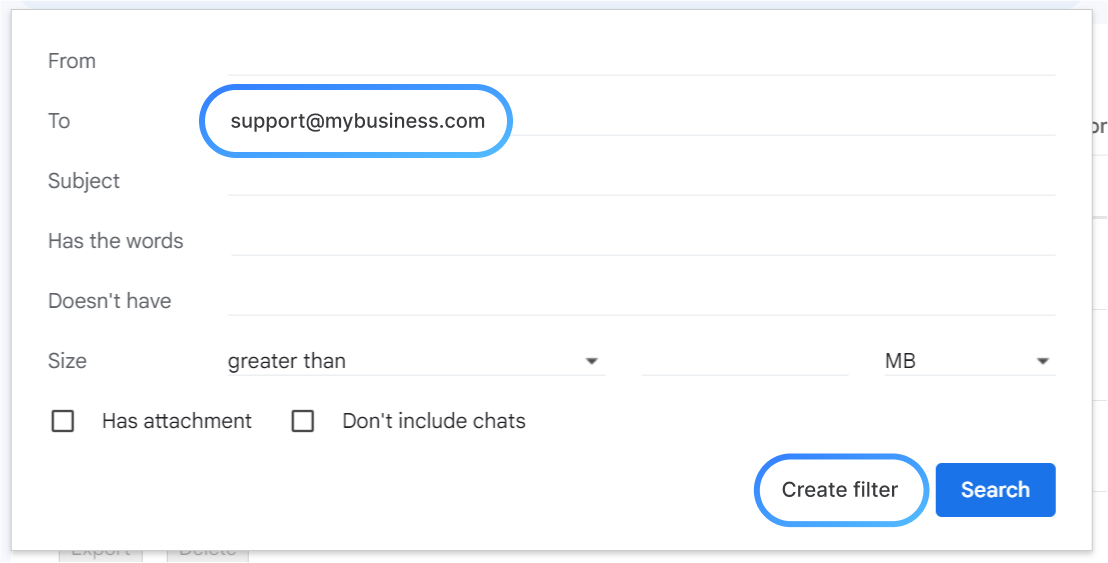
In the To field, enter the official support email you are using.
If you have verified a sender email address, make sure this is the same address you are adding here.
The click Create filter.
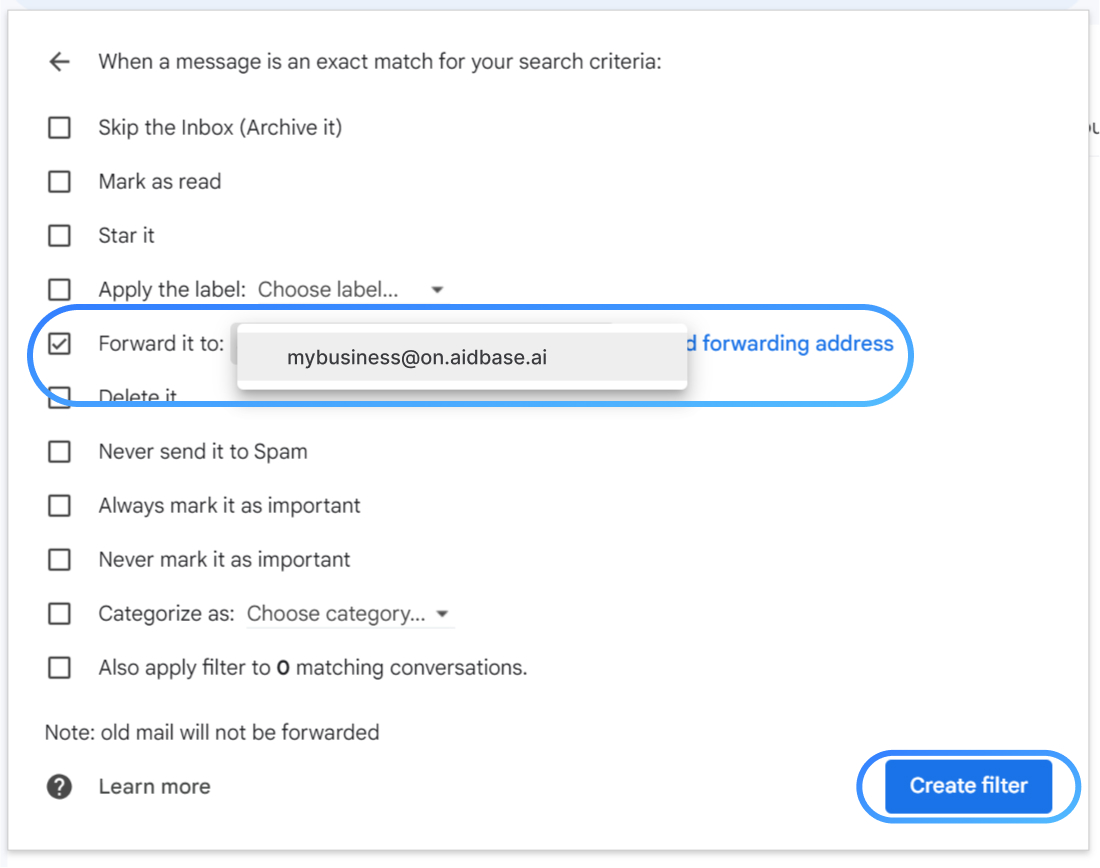
Check the box Forward it to and select the forwarding address you created just before.
Then click Create filter.
That's it 🥳
You are now ready to receive emails in Aidbase.