Create a ticket form
First, create a new ticket form and configure it to your liking.
Find the install script
Under your ticket form settings, navigate to the Settings tab.
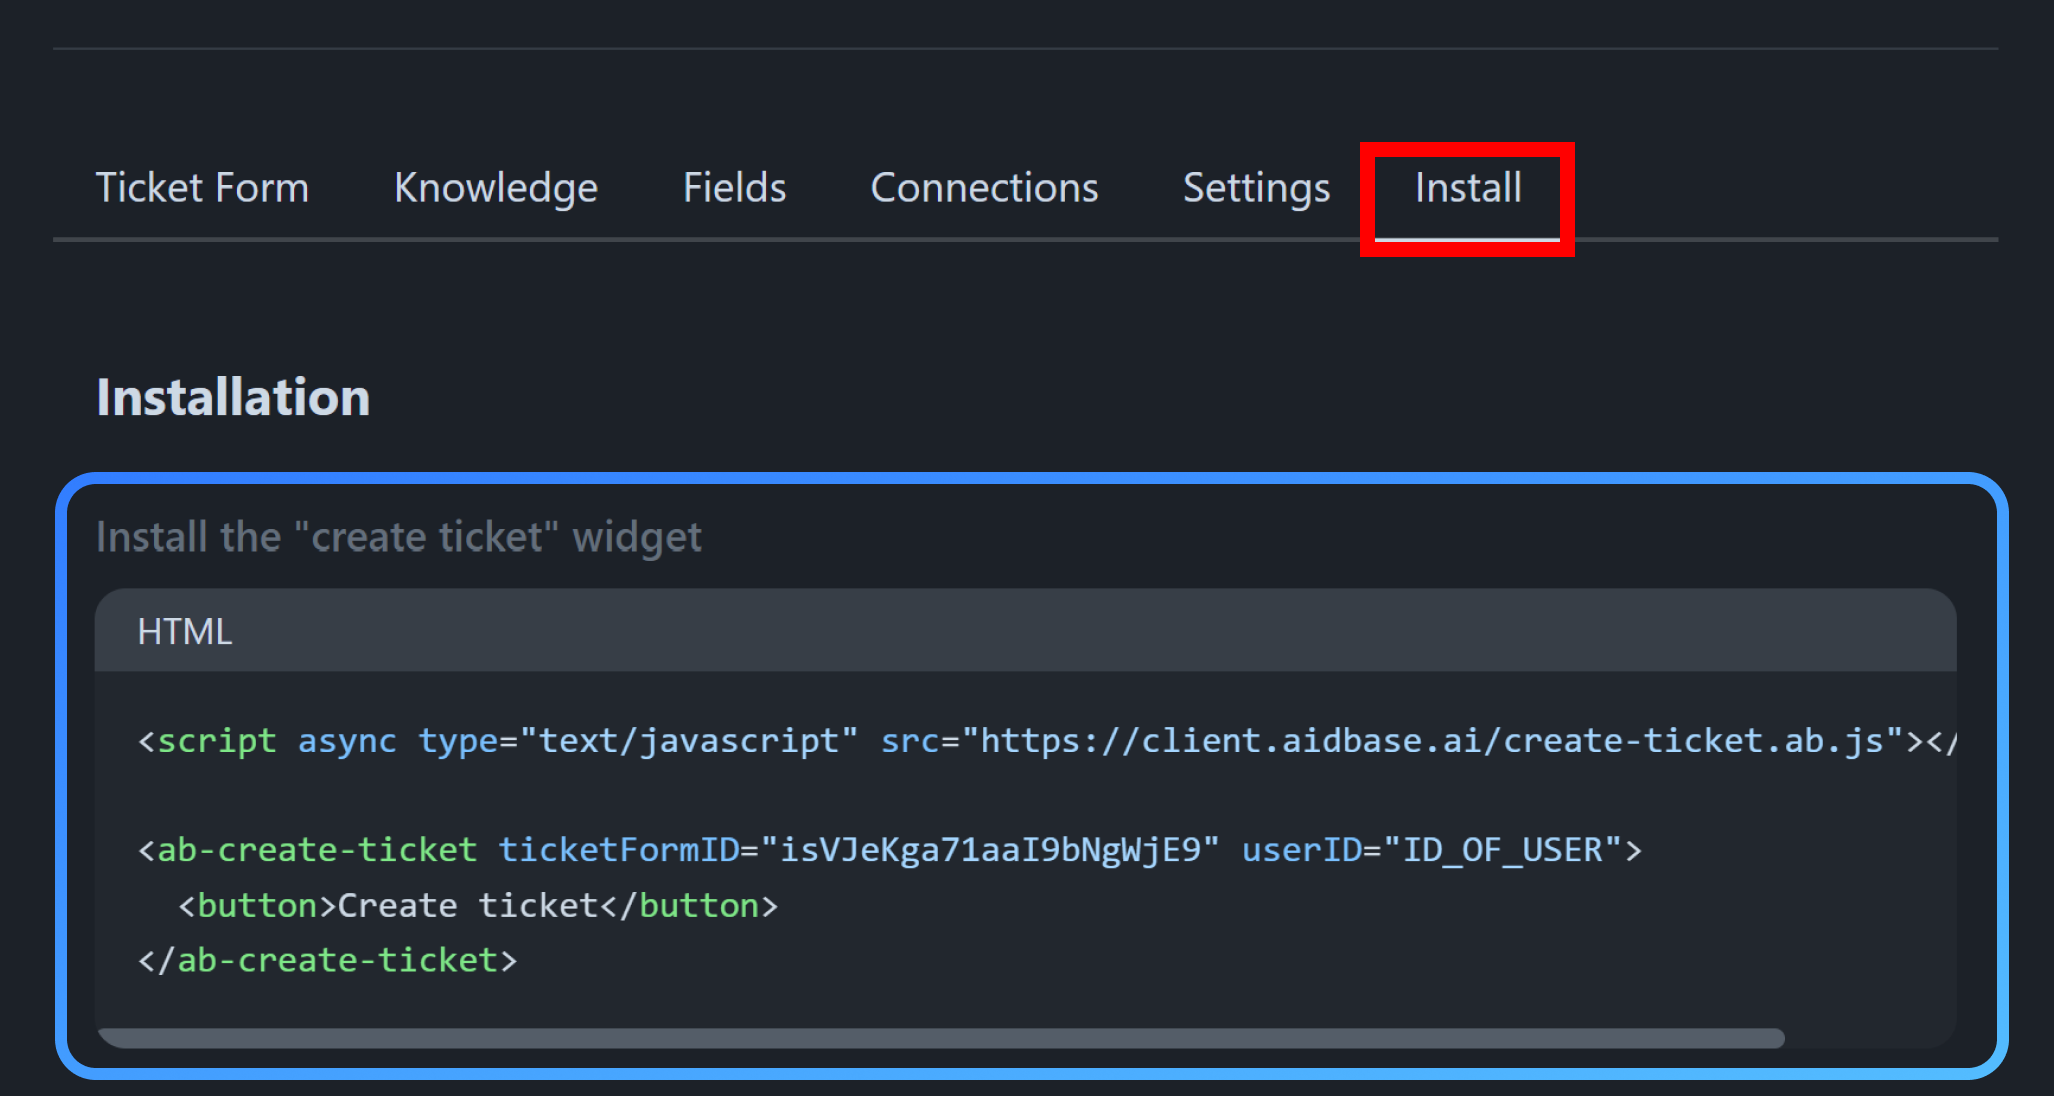
From here, you can see the installation script.
For this guide, we are not going to copy it directly, but we will use it as a reference.
Install the Aidbase script
- Go to your Shopify dashboard
- Select Themes under Online Store
- Click the Customize button
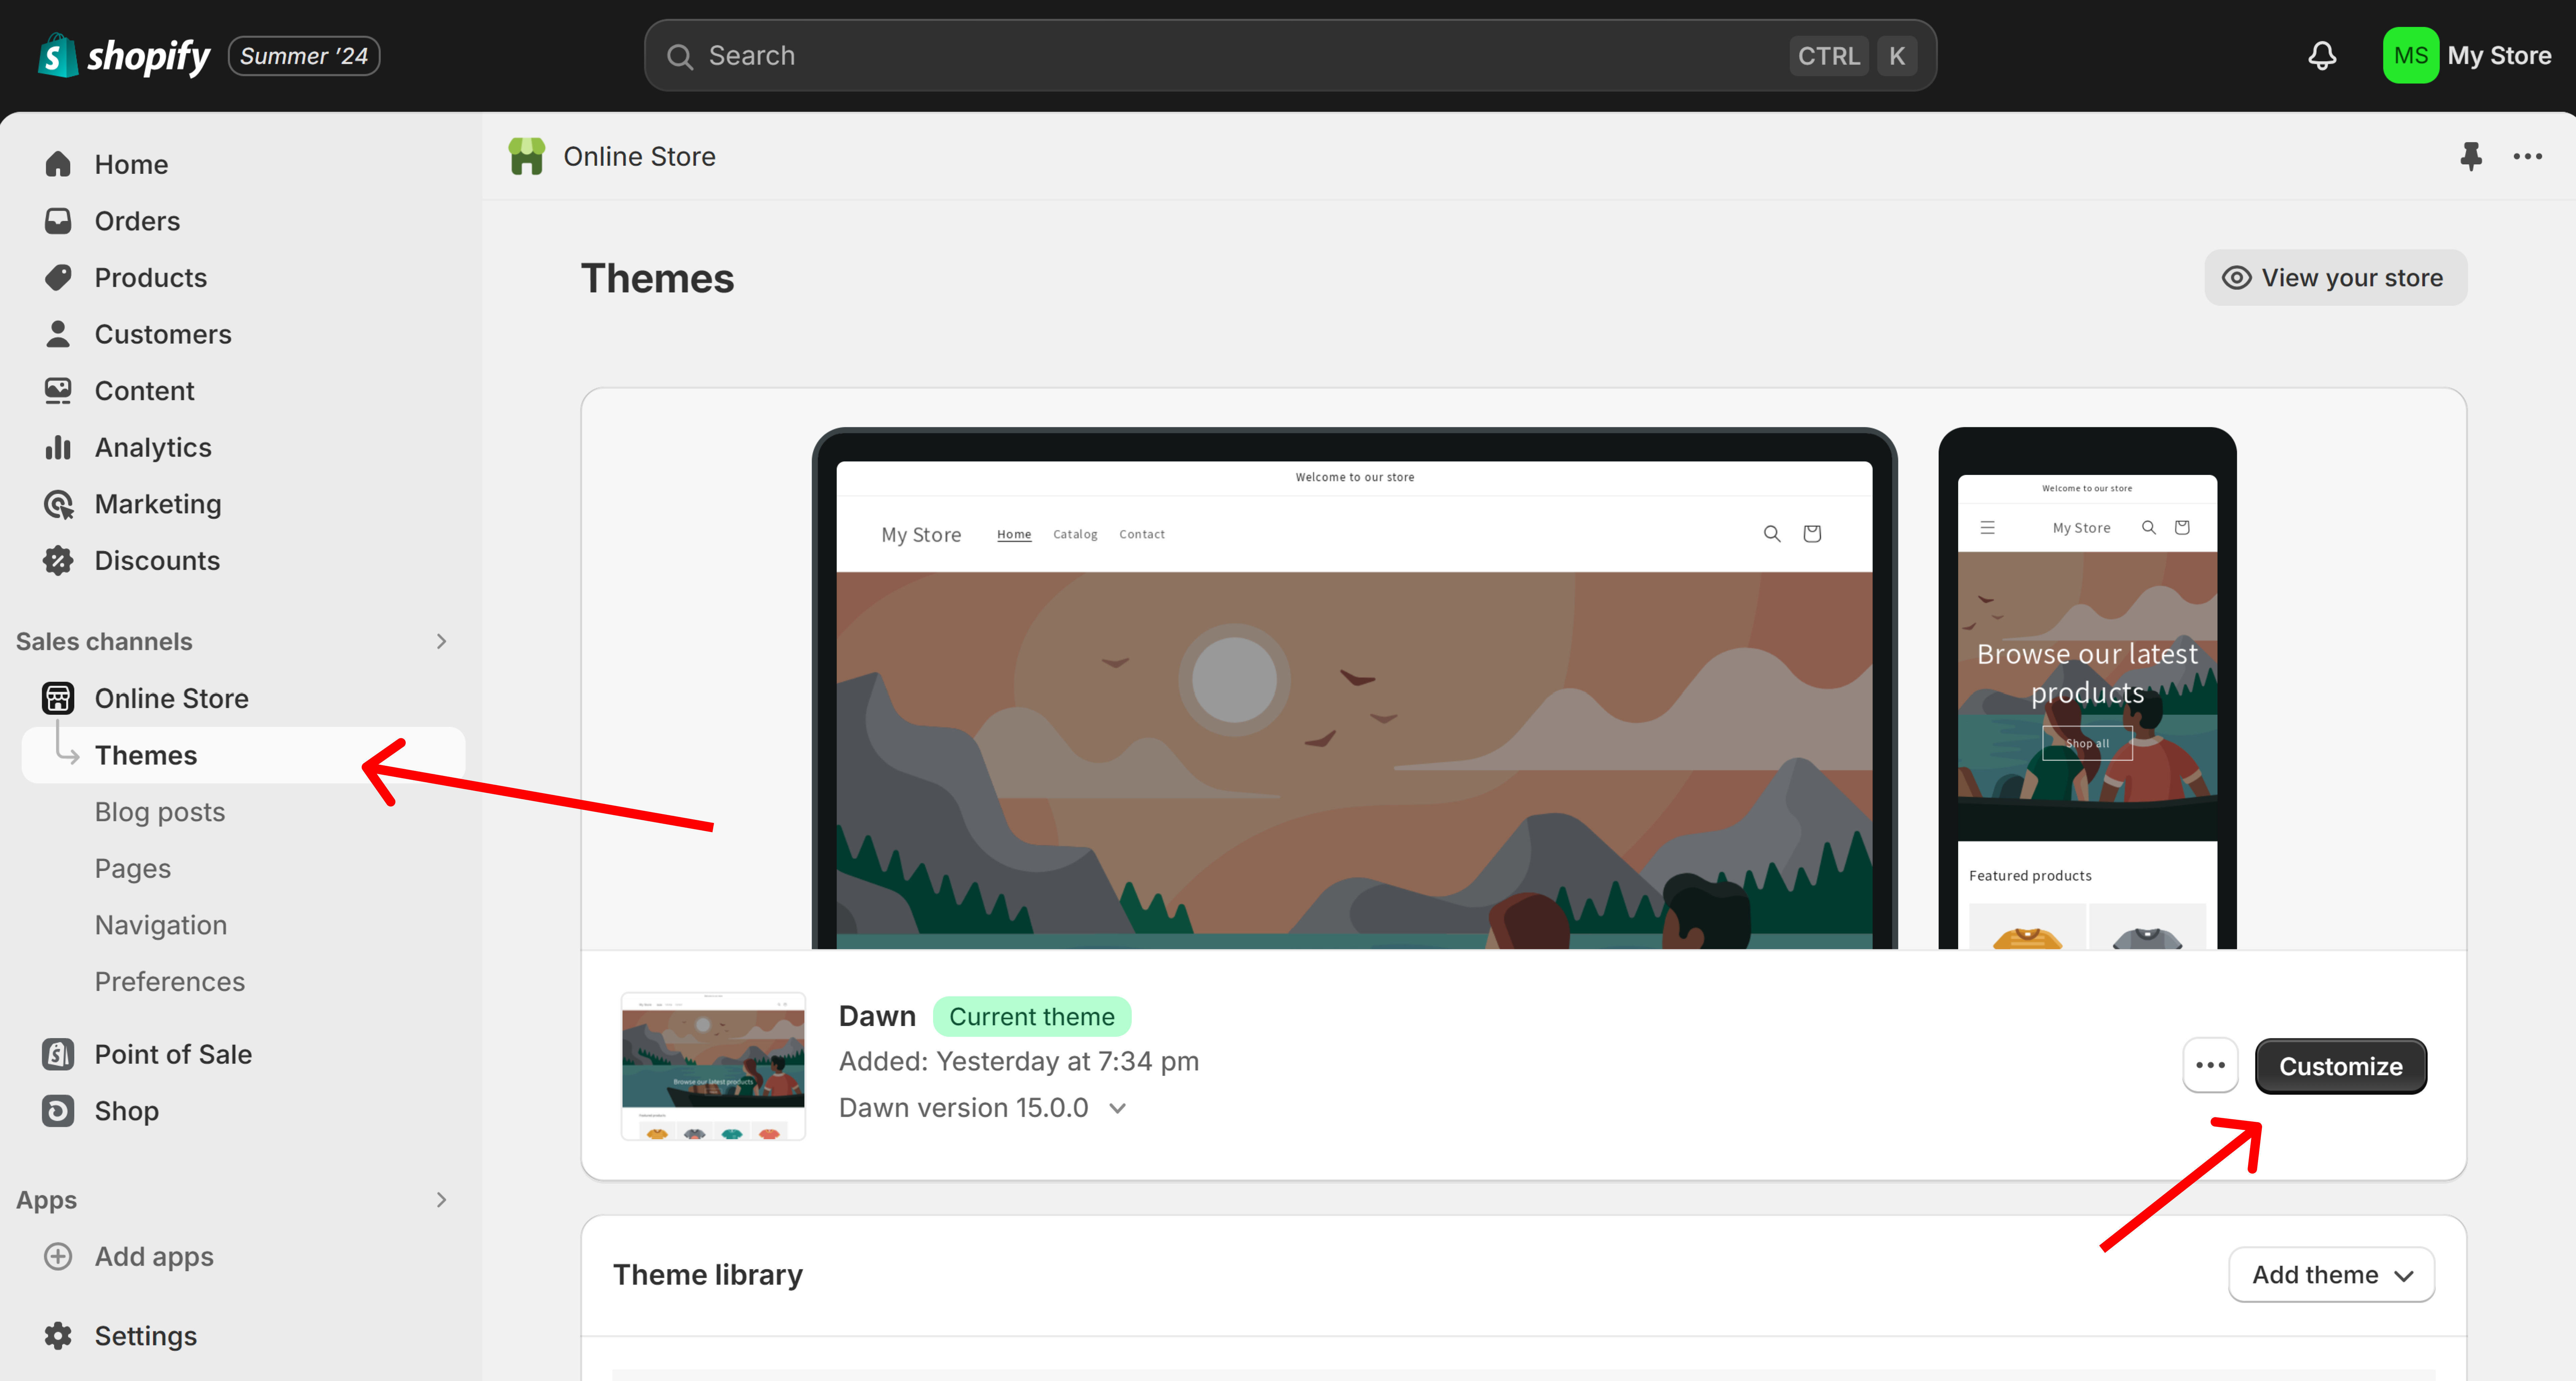
From here, we will make some small modifications to the theme. If you haven’t done this before, it might look a little scary. But don’t worry, it’s very easy, even if you’re not a programmer.
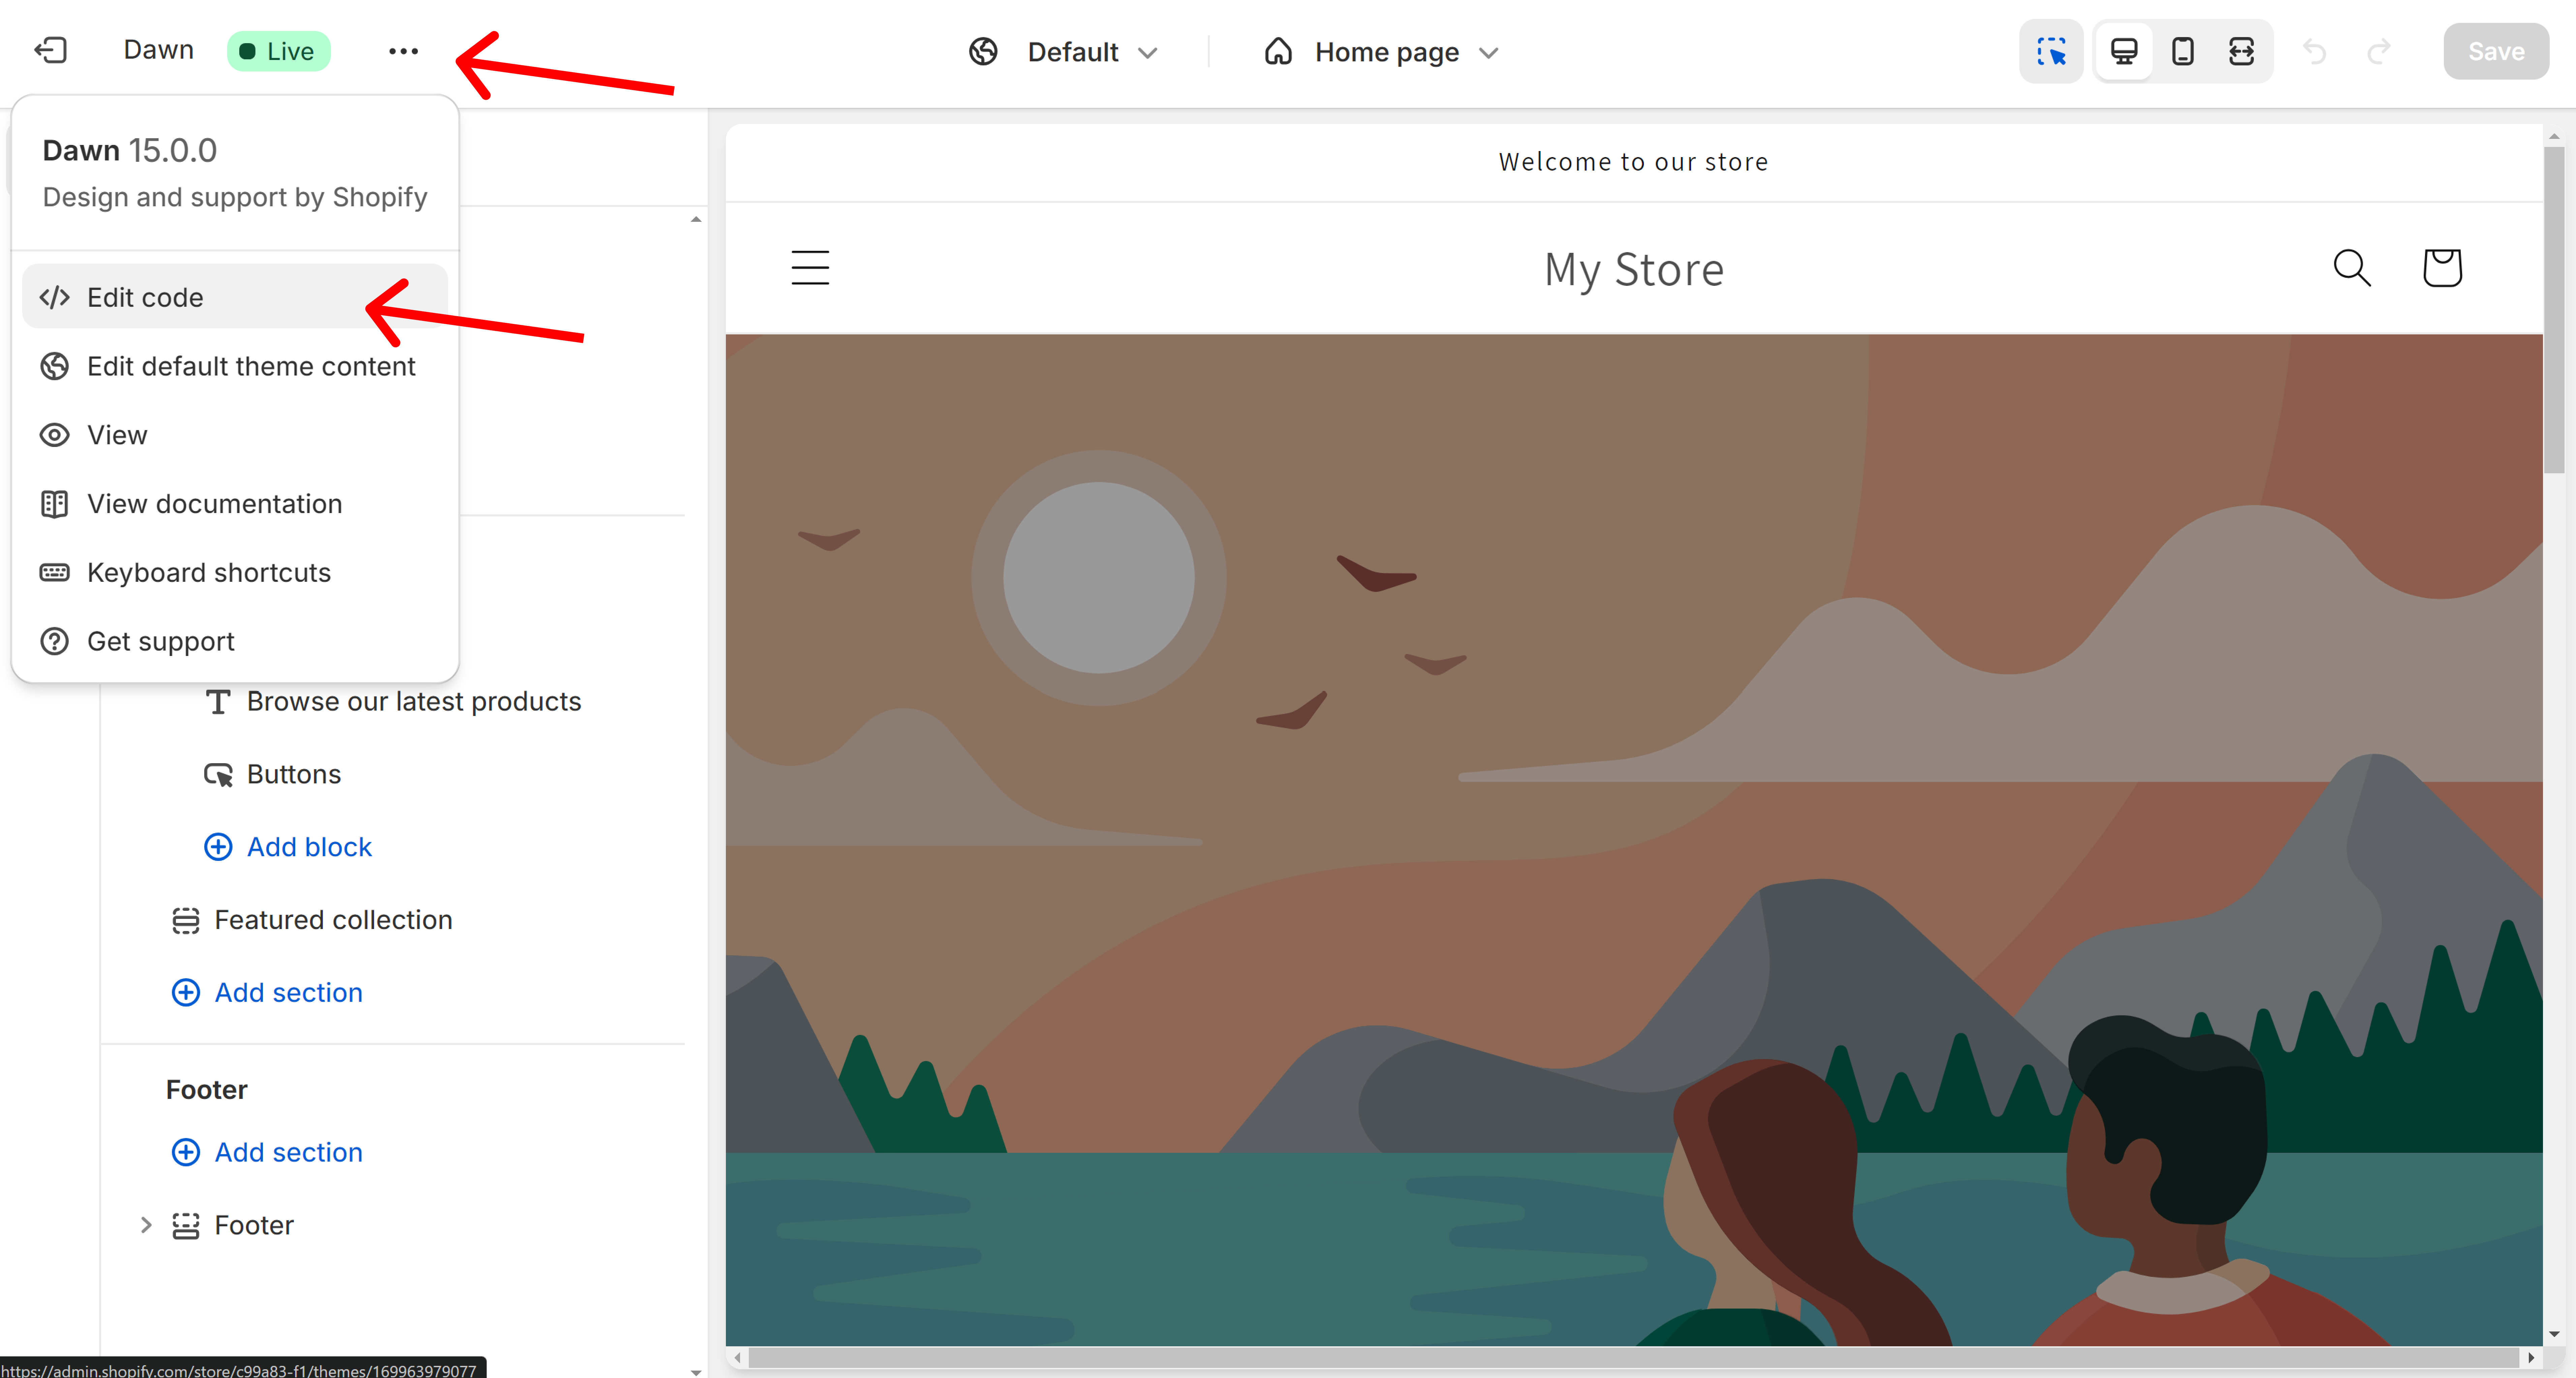
- Select the small
...button in the top left corner. - Select “Edit code”
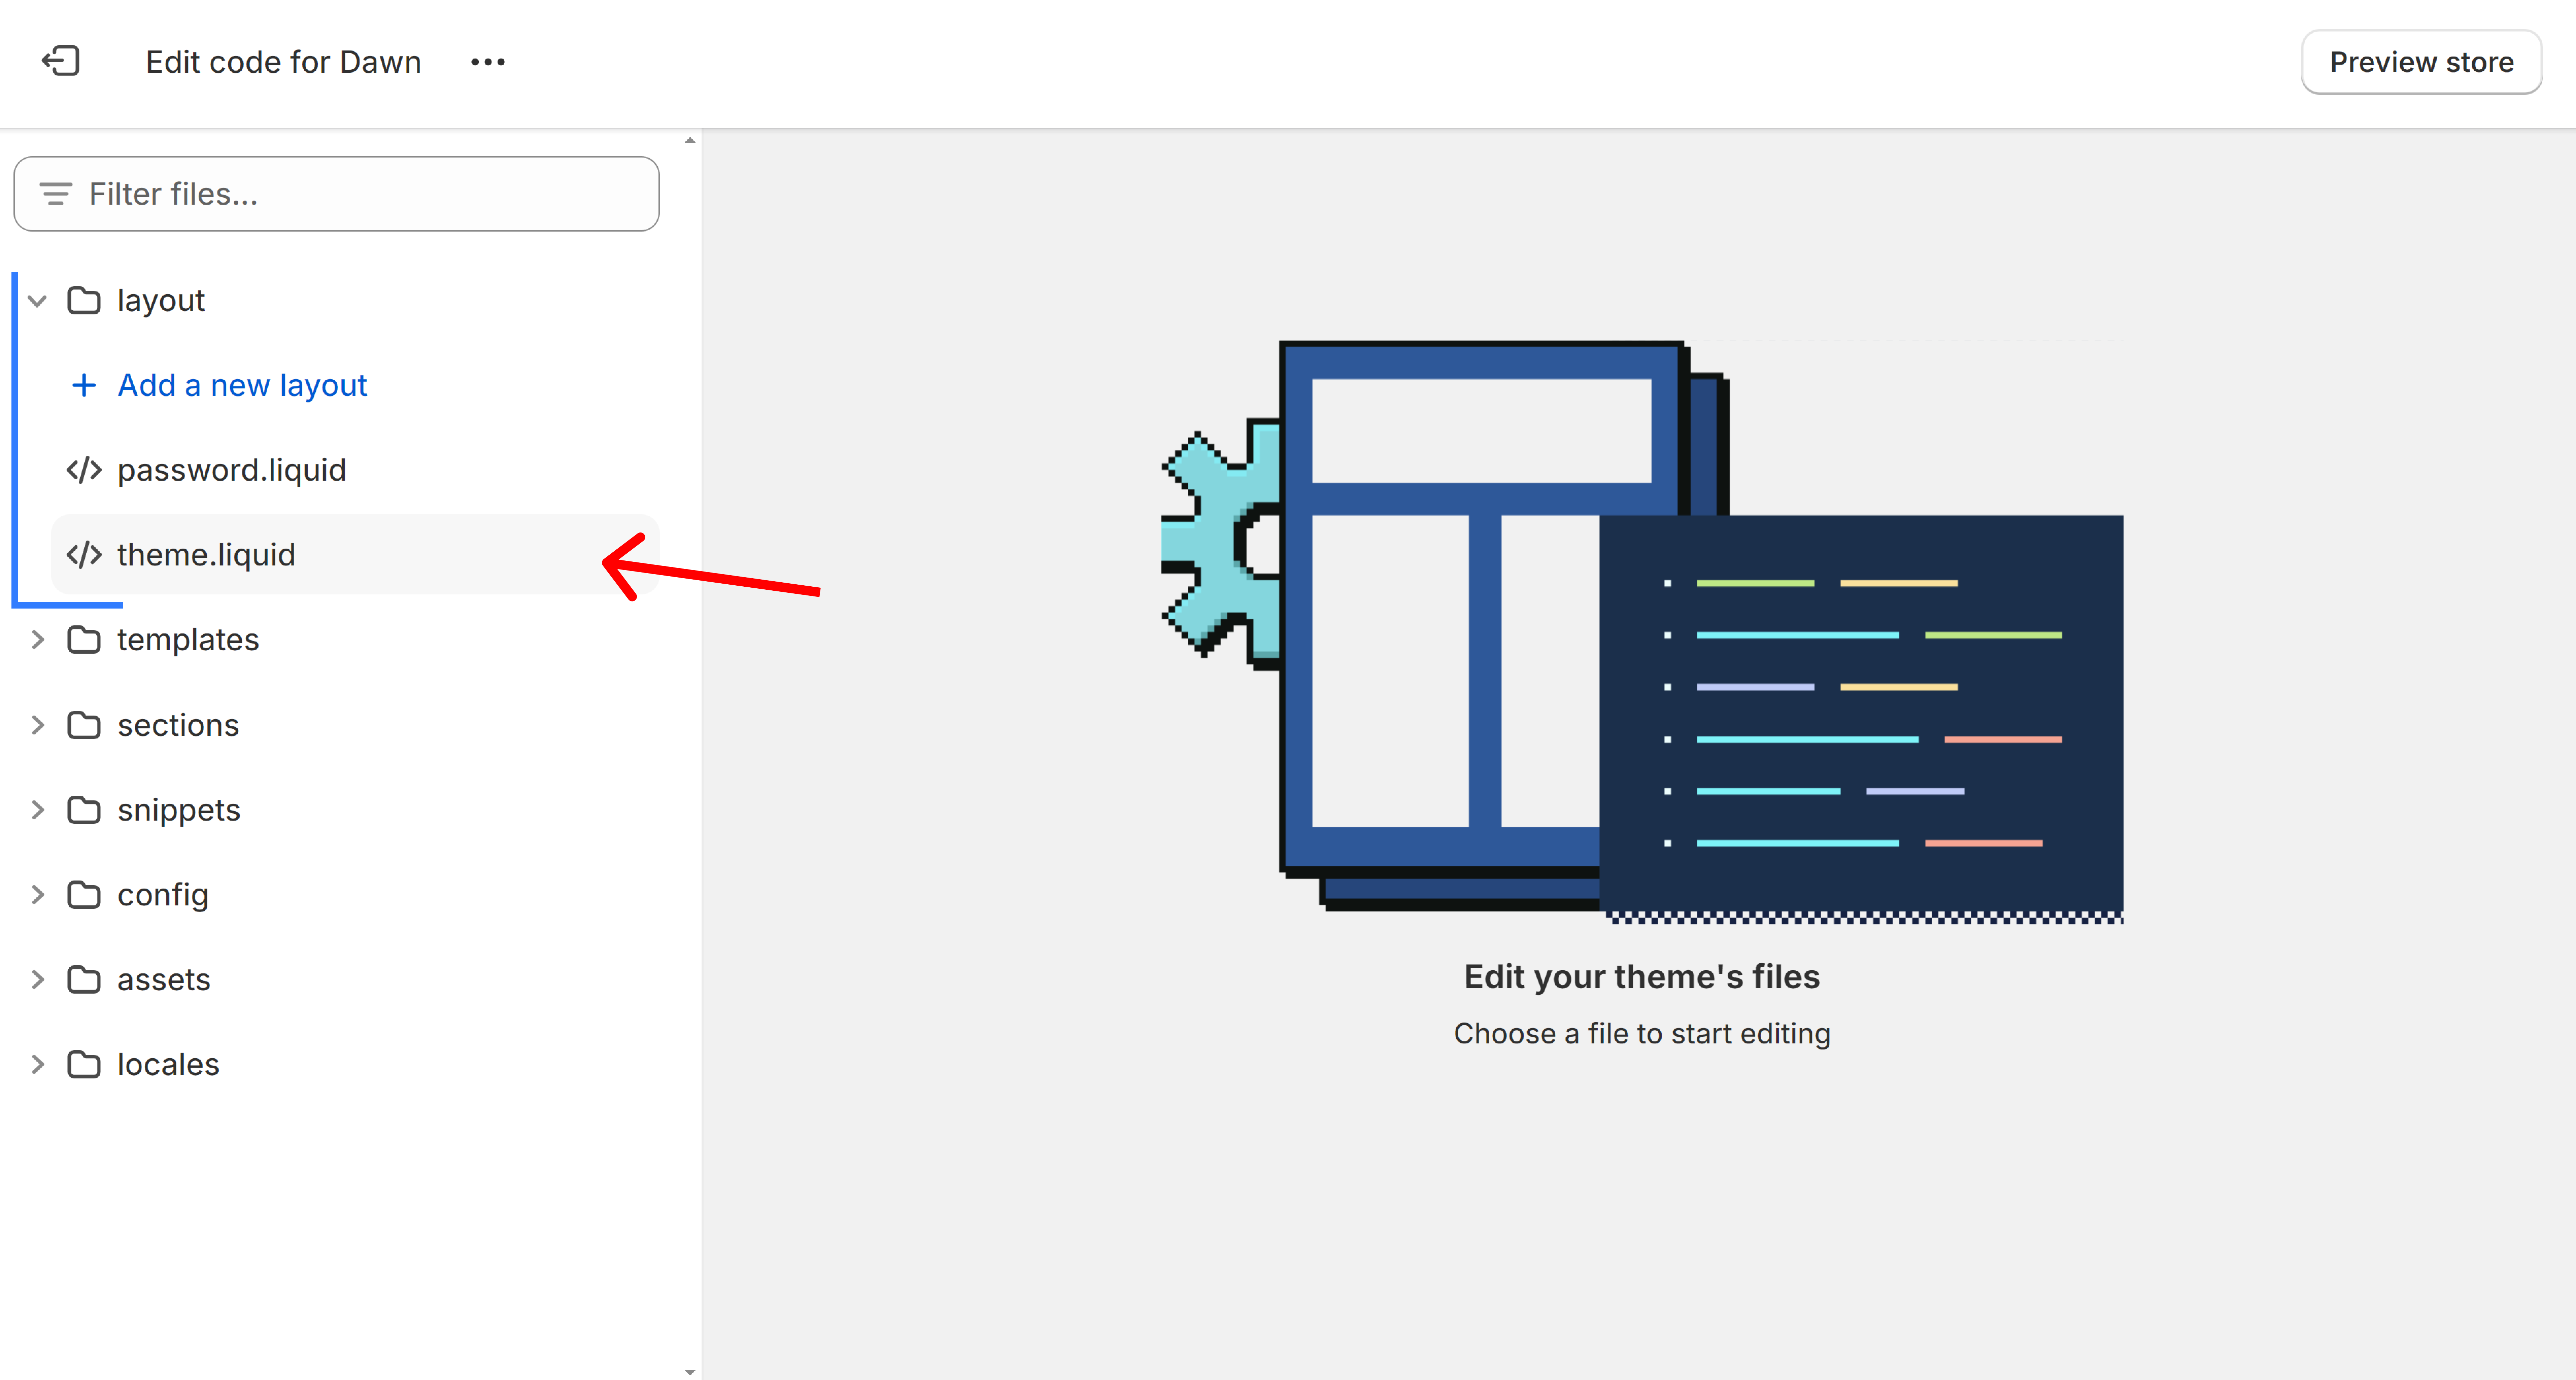
Depending on the theme you have installed, these files and folders may look a little different from you.
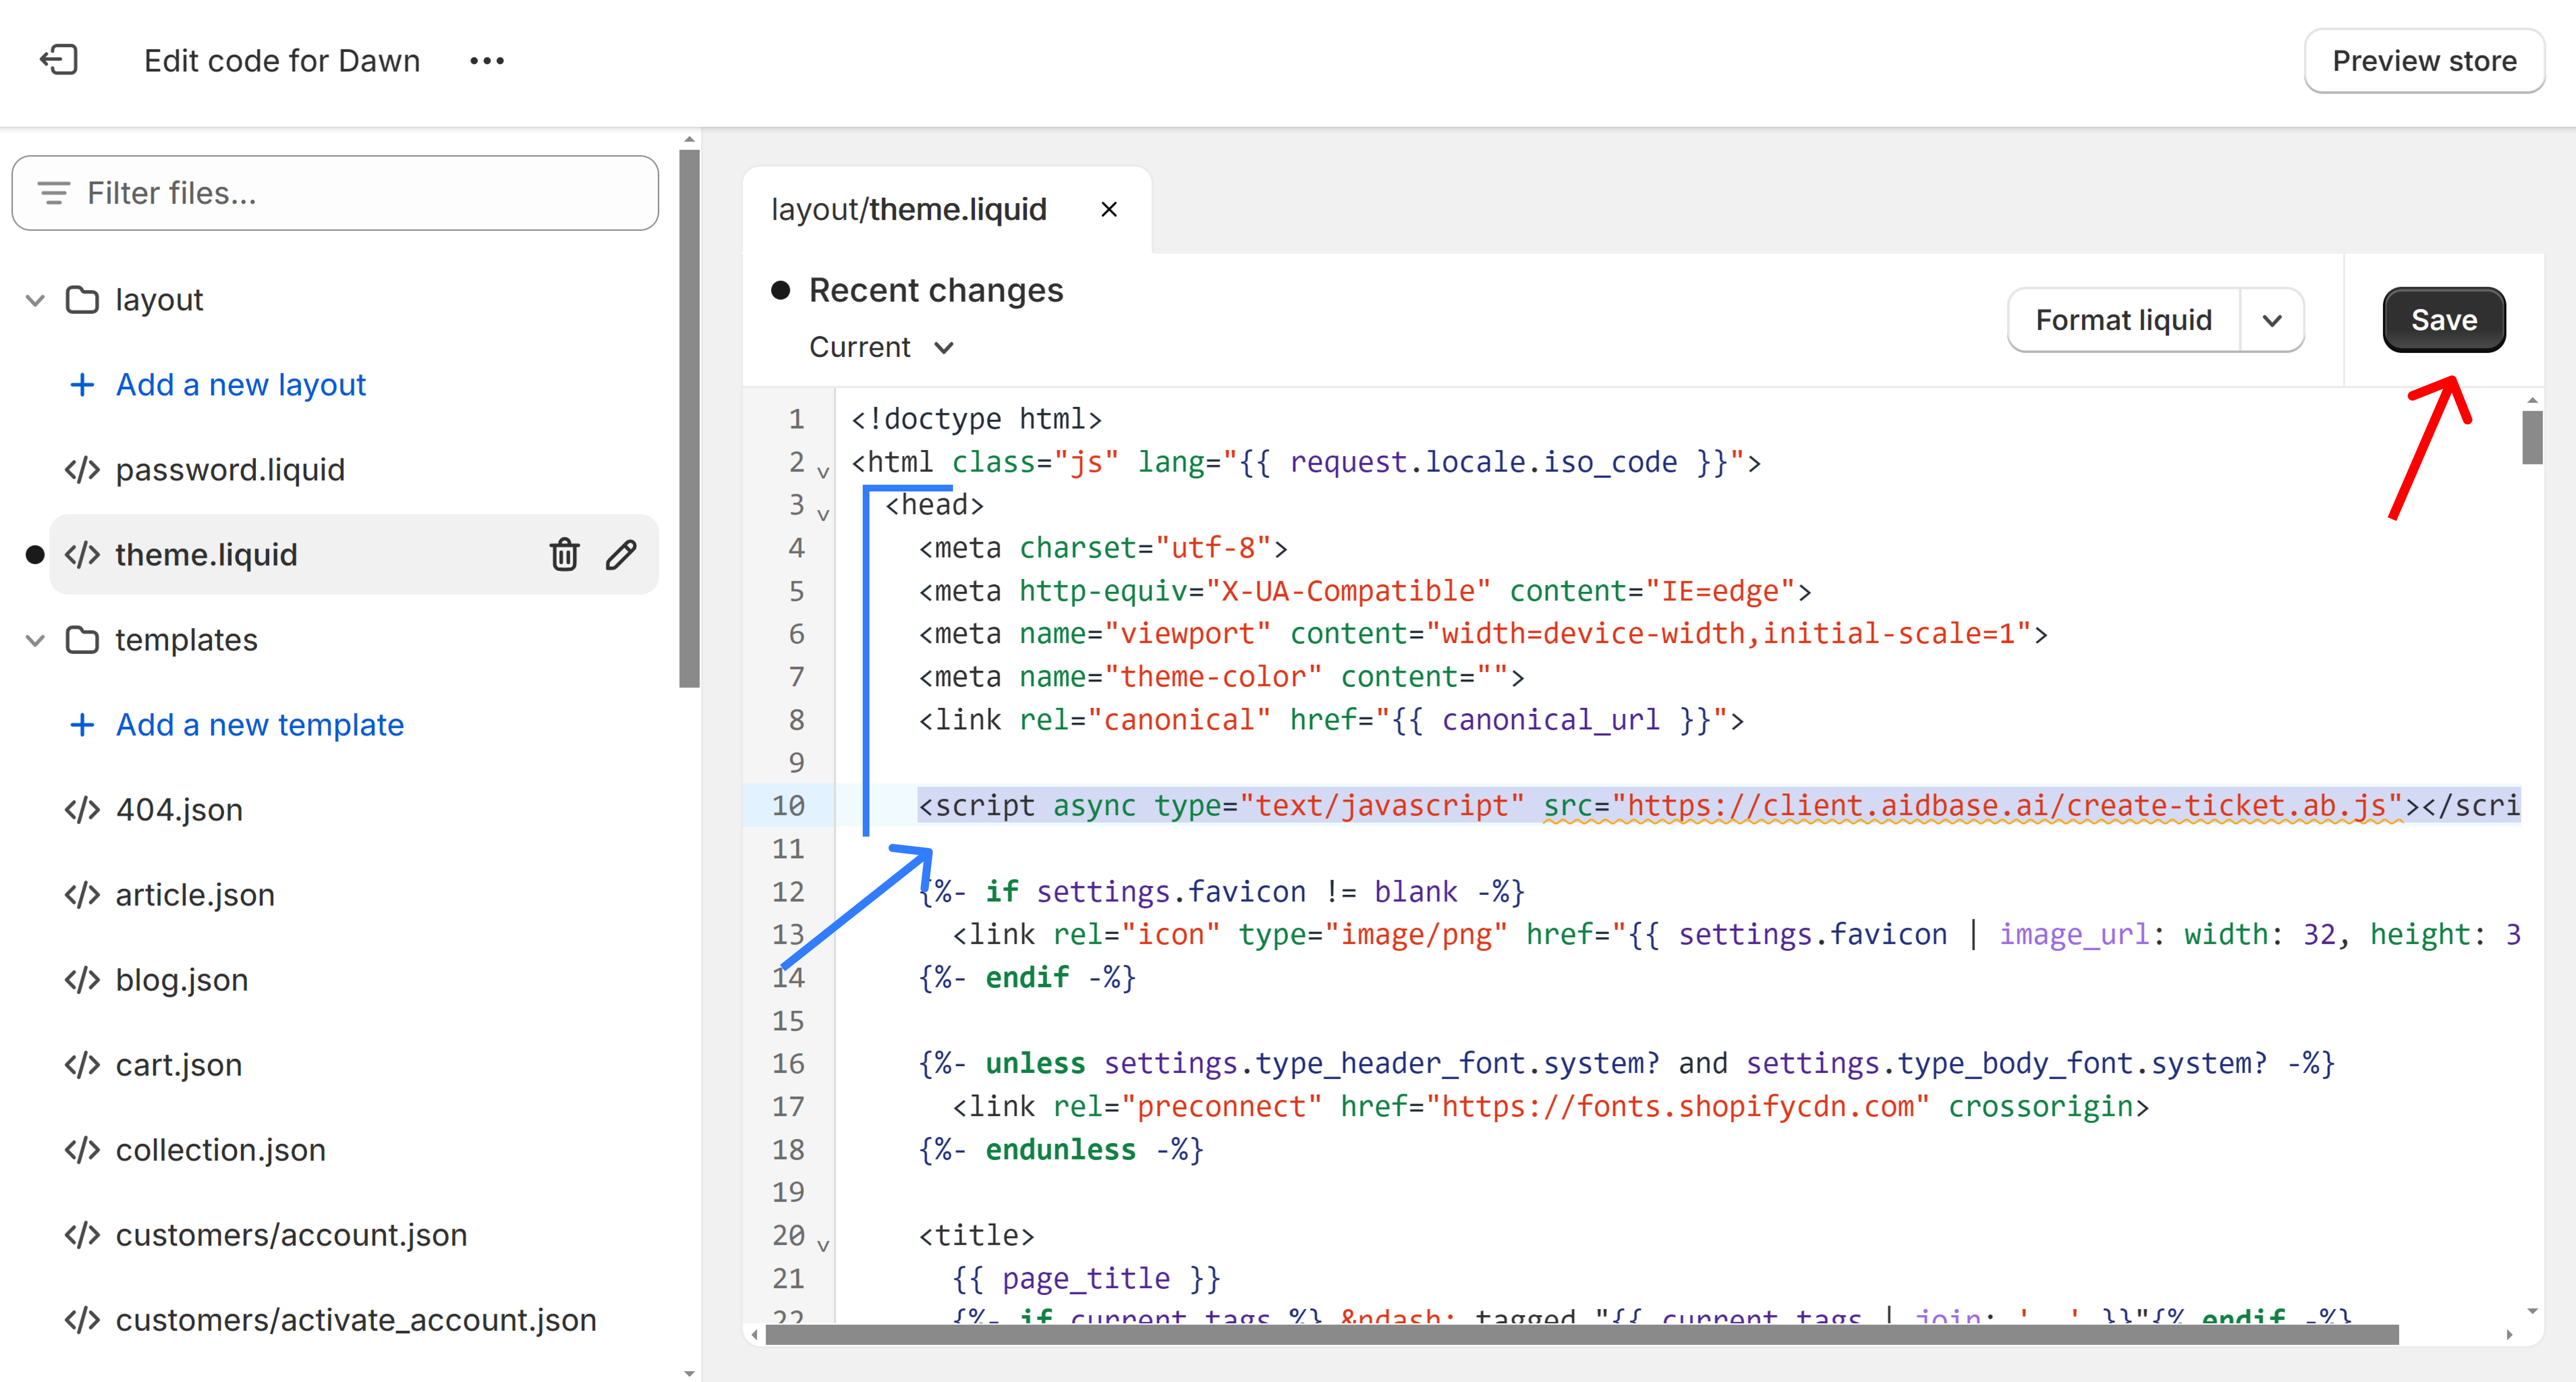
In any case, you should have a file called theme.liquid typically located in the layout folder.
Click this file.
Under the <head> section of the file, add the <script> tag from the first step in the Head section.
Embed the ticket form
You typically want to install the ticket form on a contact page or support page.
For this, we need two things:
- A button that says “Create ticket”
- A ticket form that opens as a modal when the button is clicked.
Let’s take a look at how to do this:
- Go back to your Shopify dashboard.
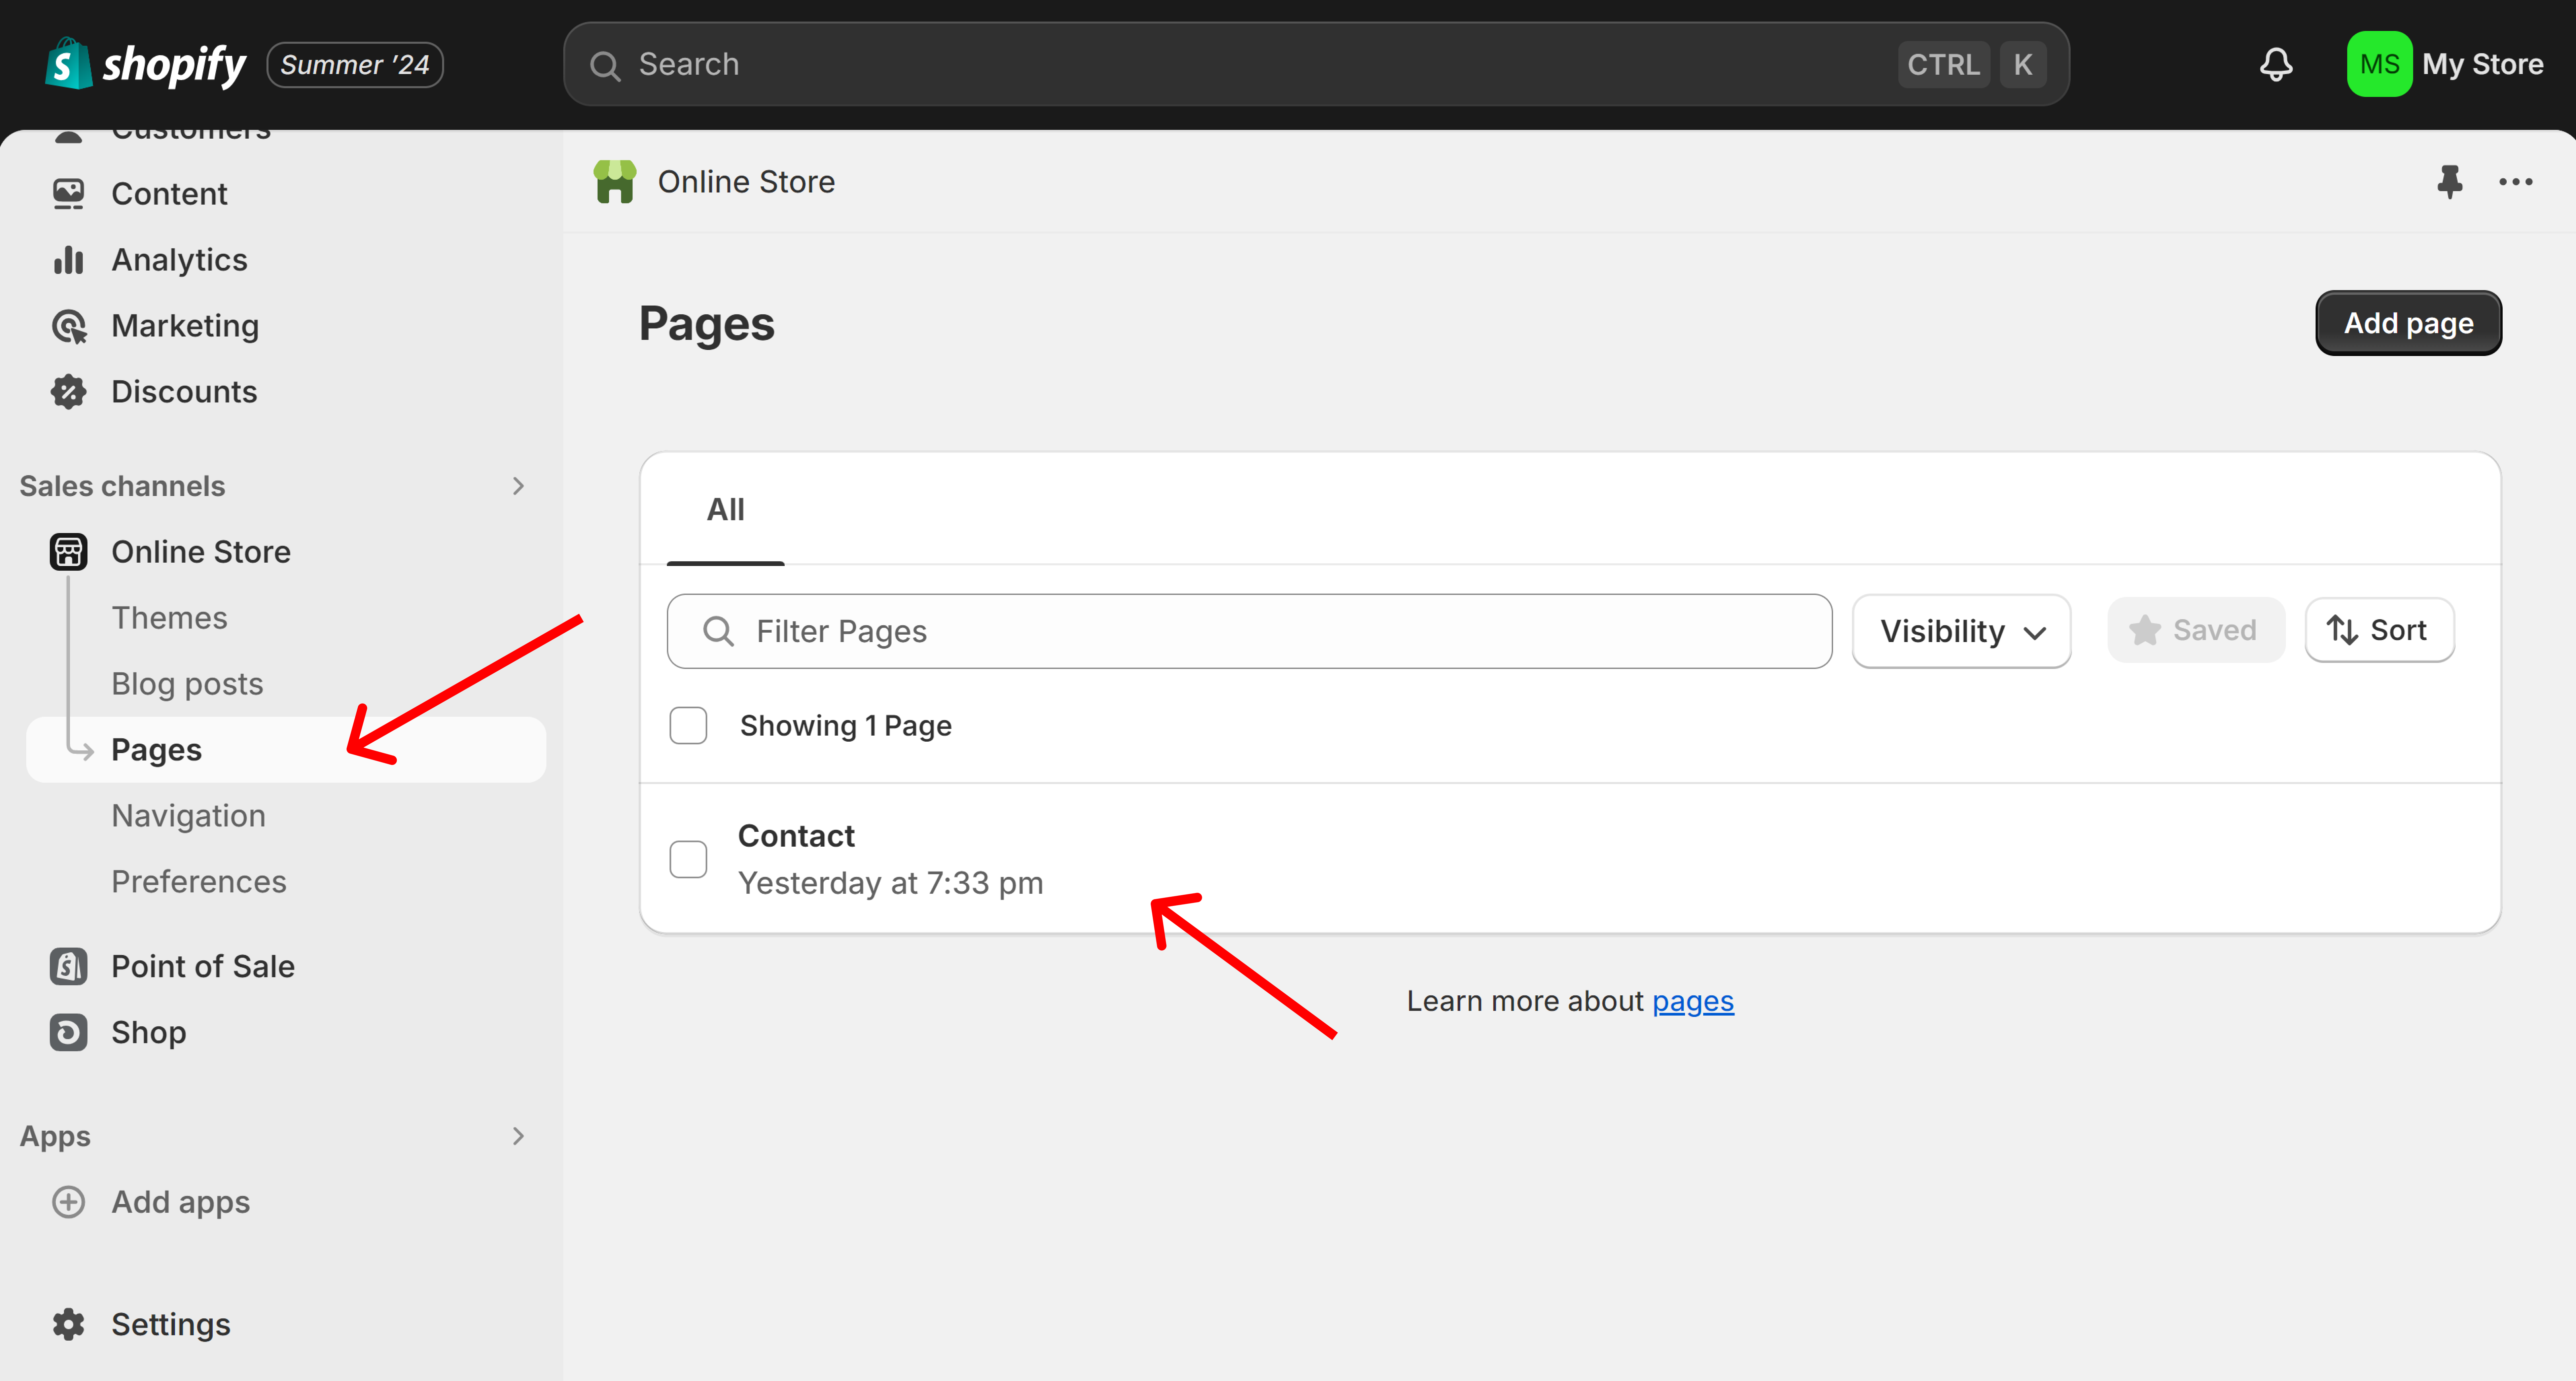
- Click Pages under Online Store, then click the page you want to edit
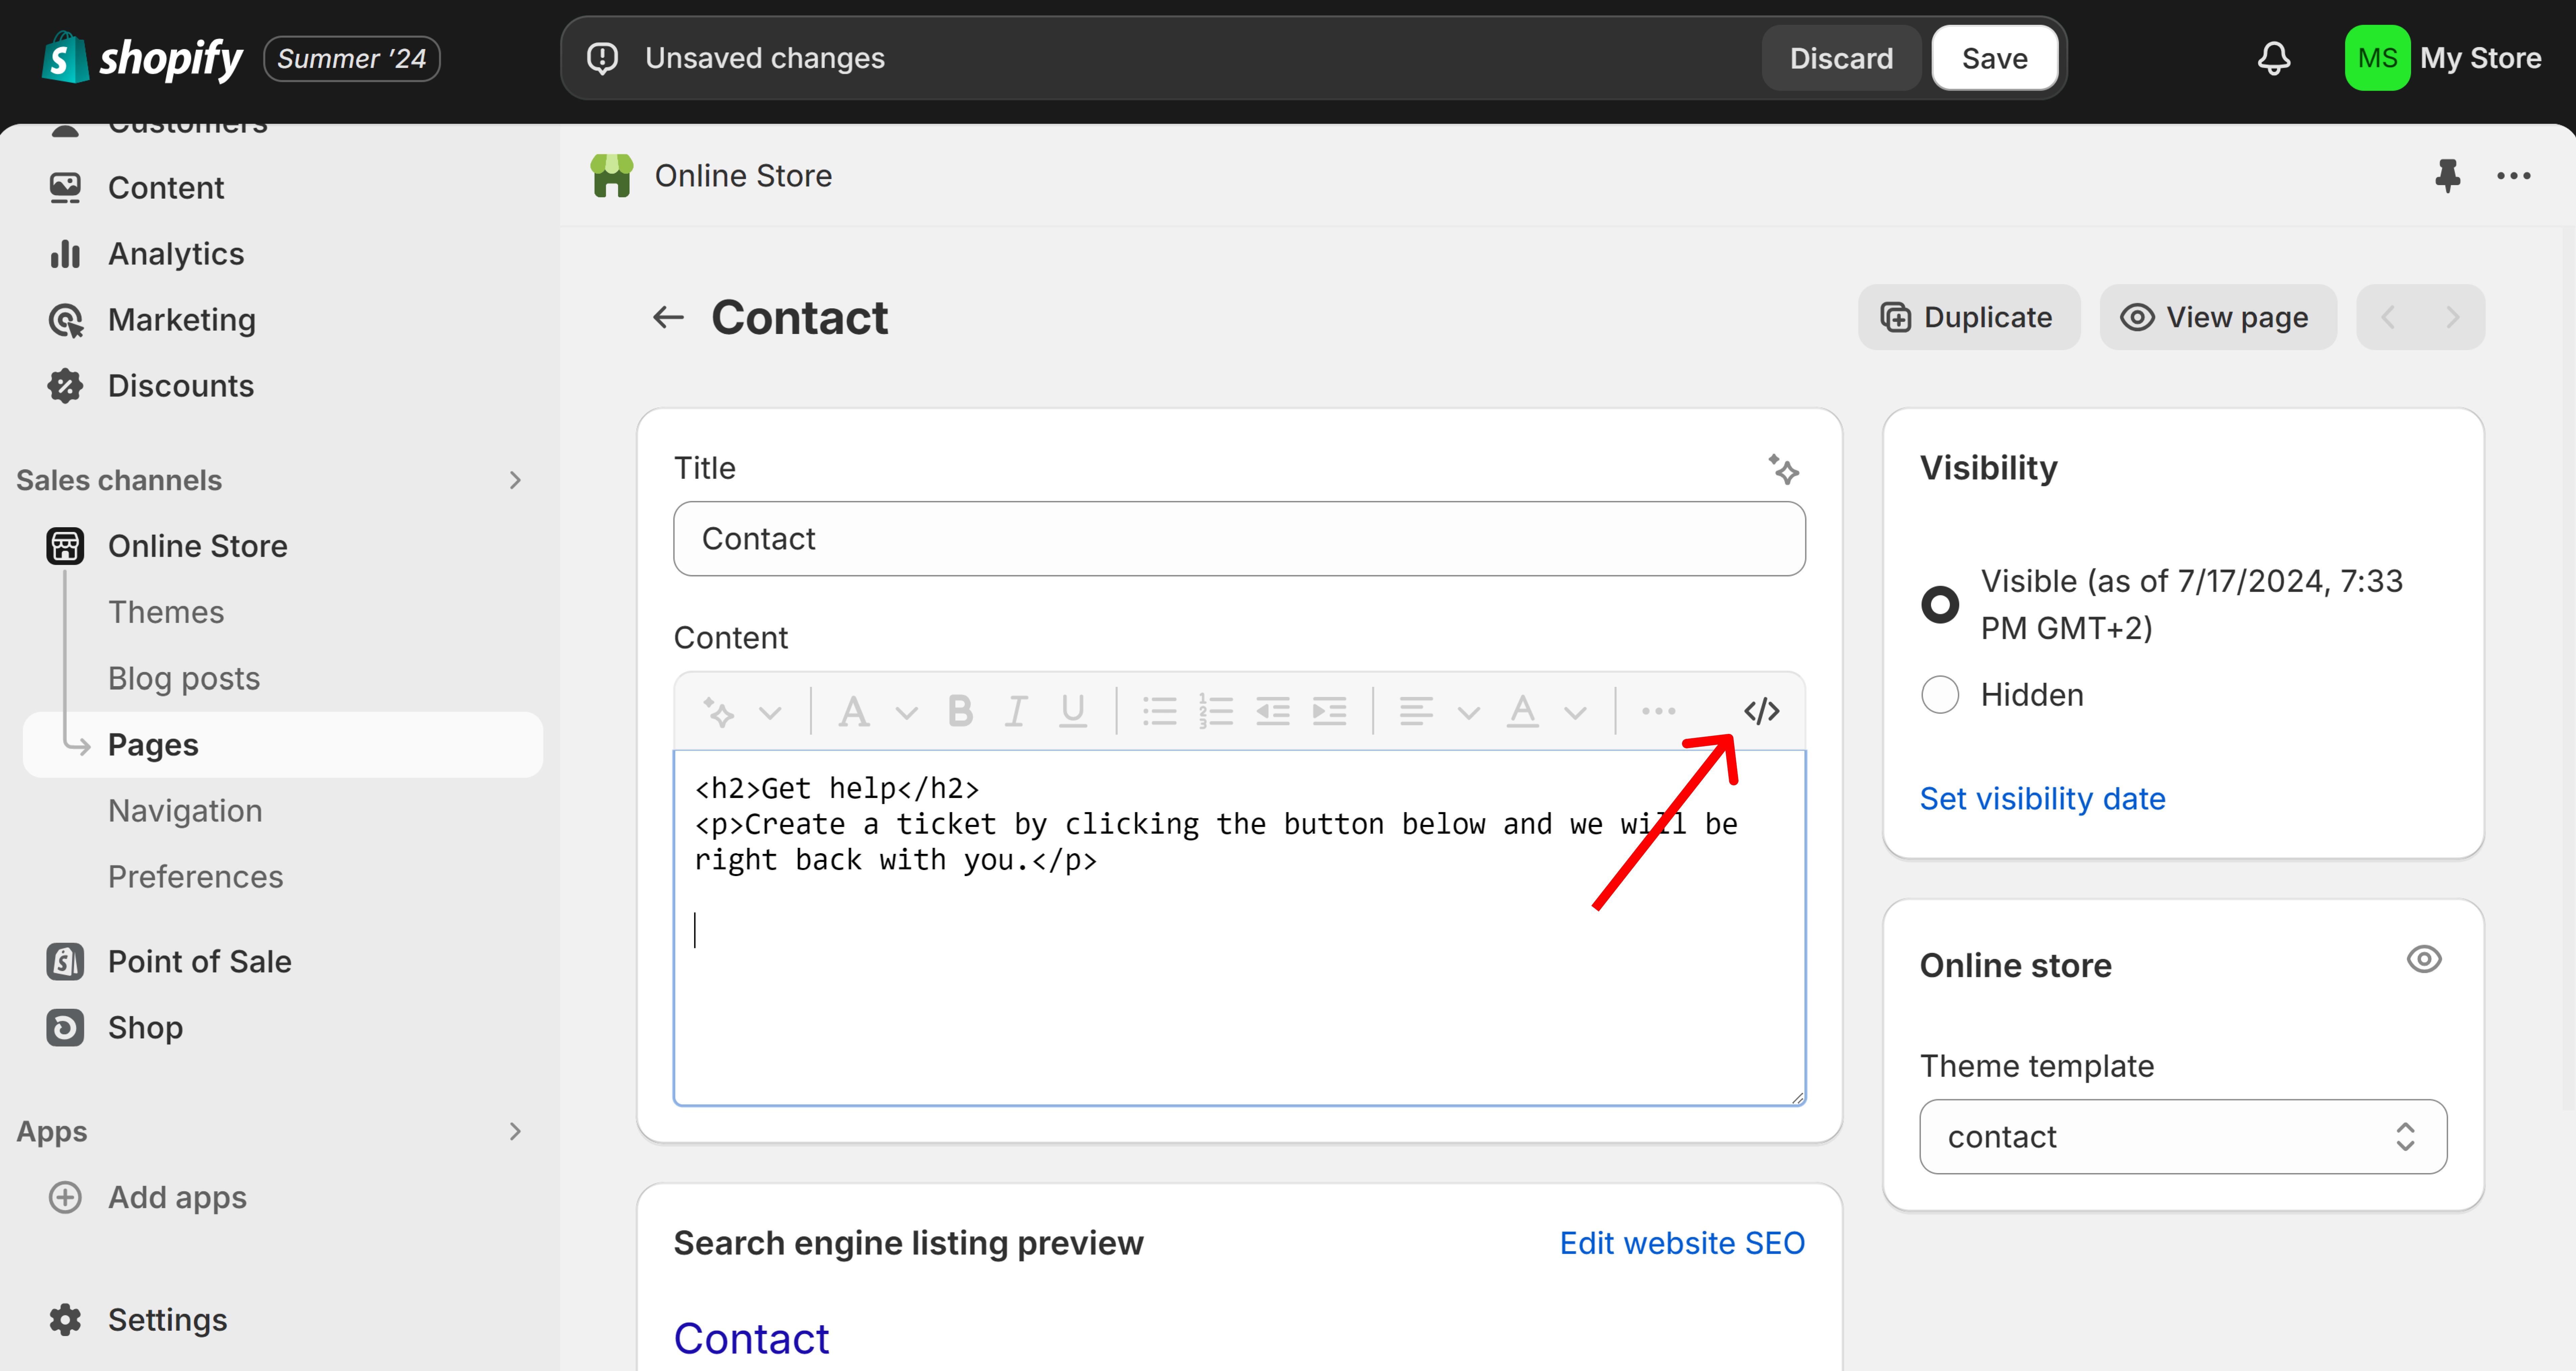
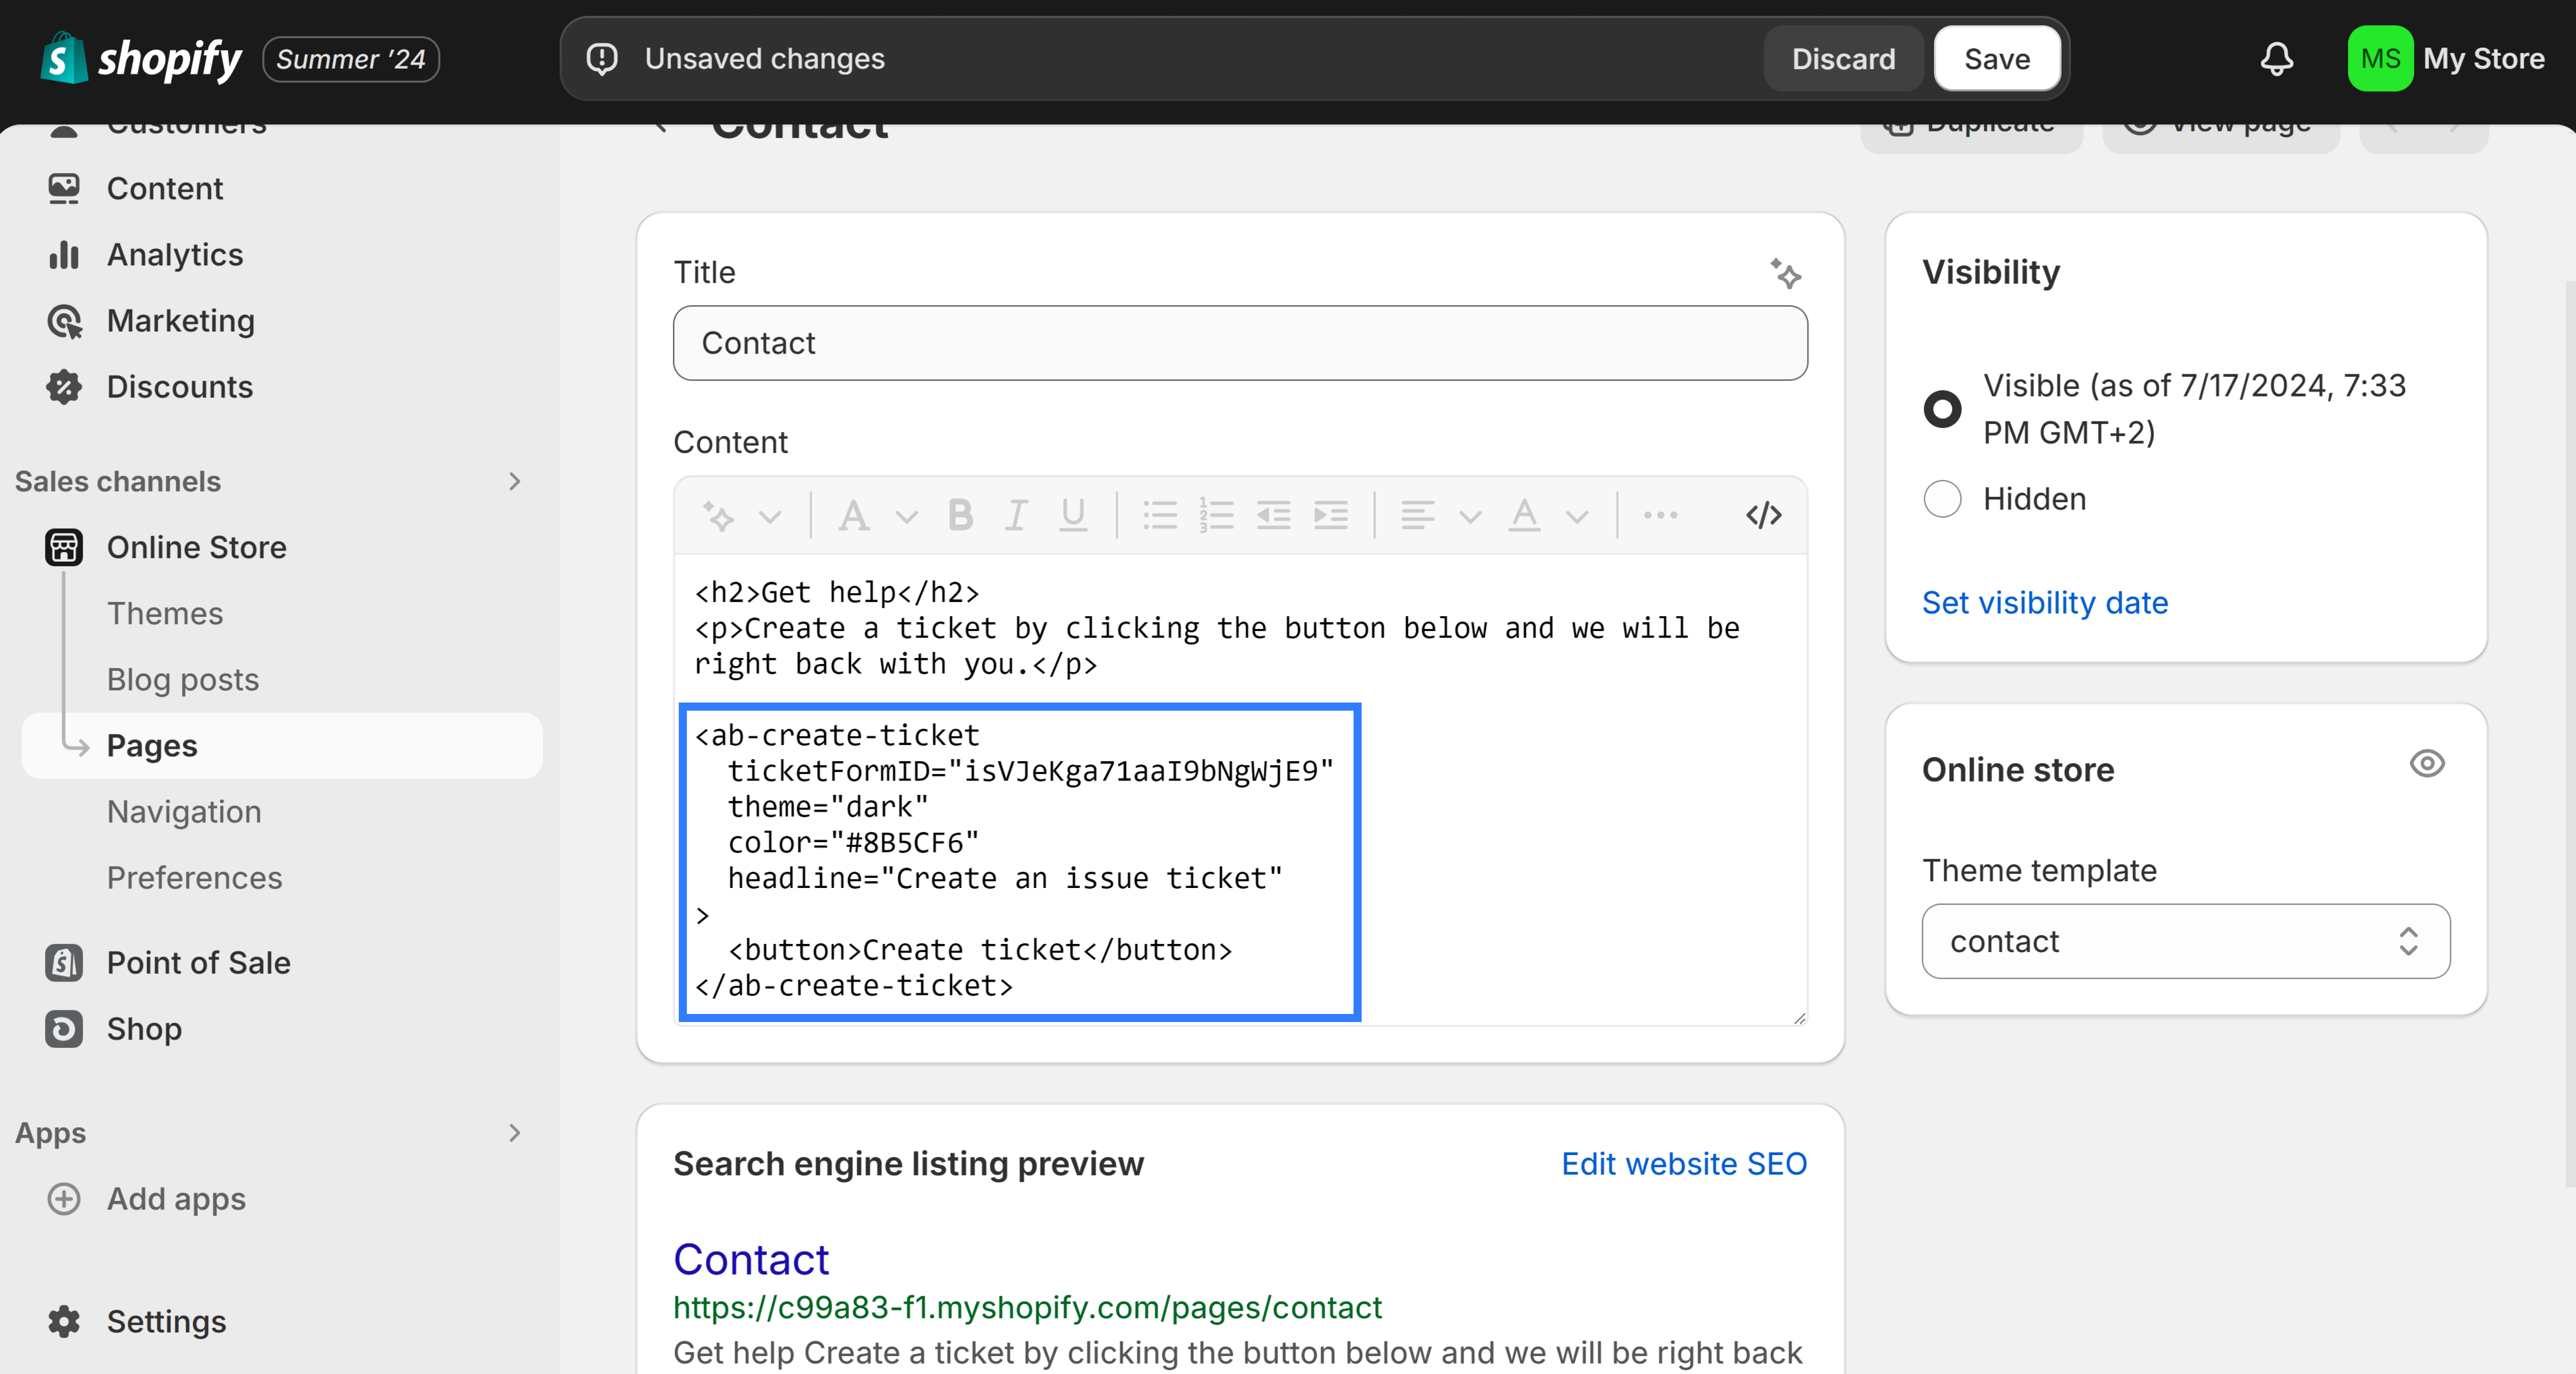
Click on the little <> code button to enable HTML code editing.
Insert the last part of the script from the first step.
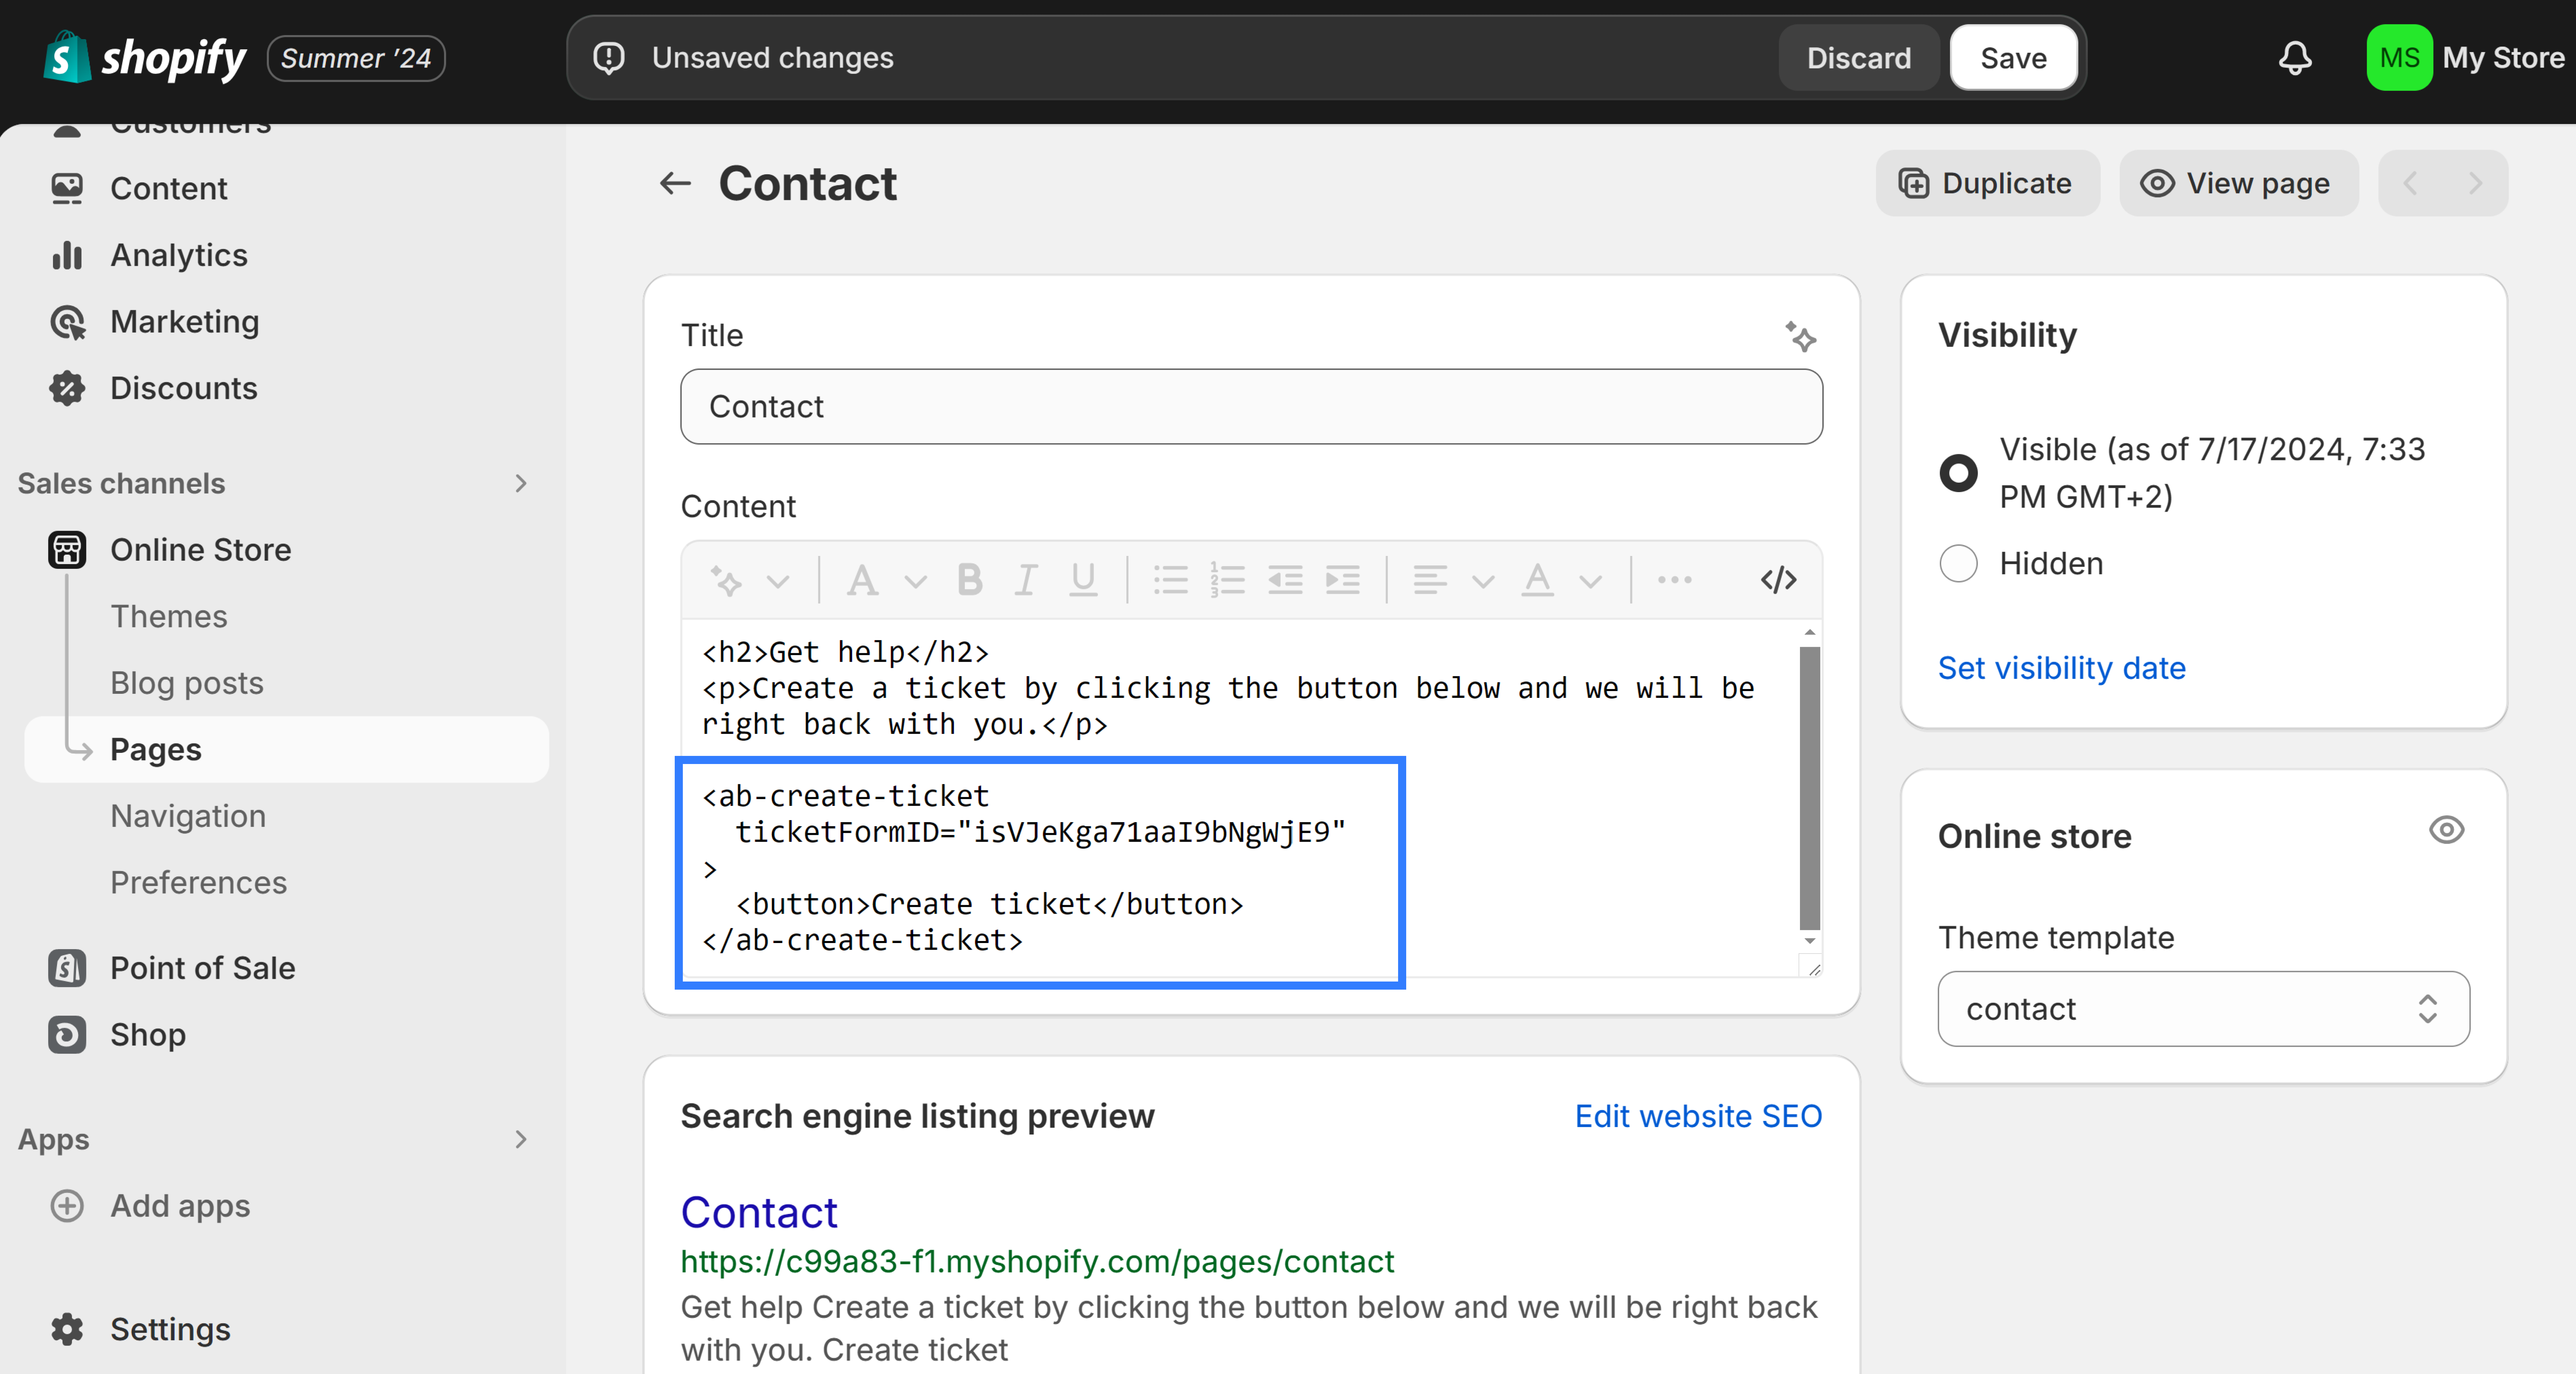
You can add as many additional attributes as you need to customize the ticket form’s behavior.
See our reference guide for a full list of available attributes and a description of what they do.
That’s it! Your Aidbase ticket form is now fully integrated 🥳