Adding your ticket form to Webflow
Create a ticket form
First, create a new ticket form and configure it to your liking.
Find the install script
Under your ticket form settings, navigate to the Settings tab.
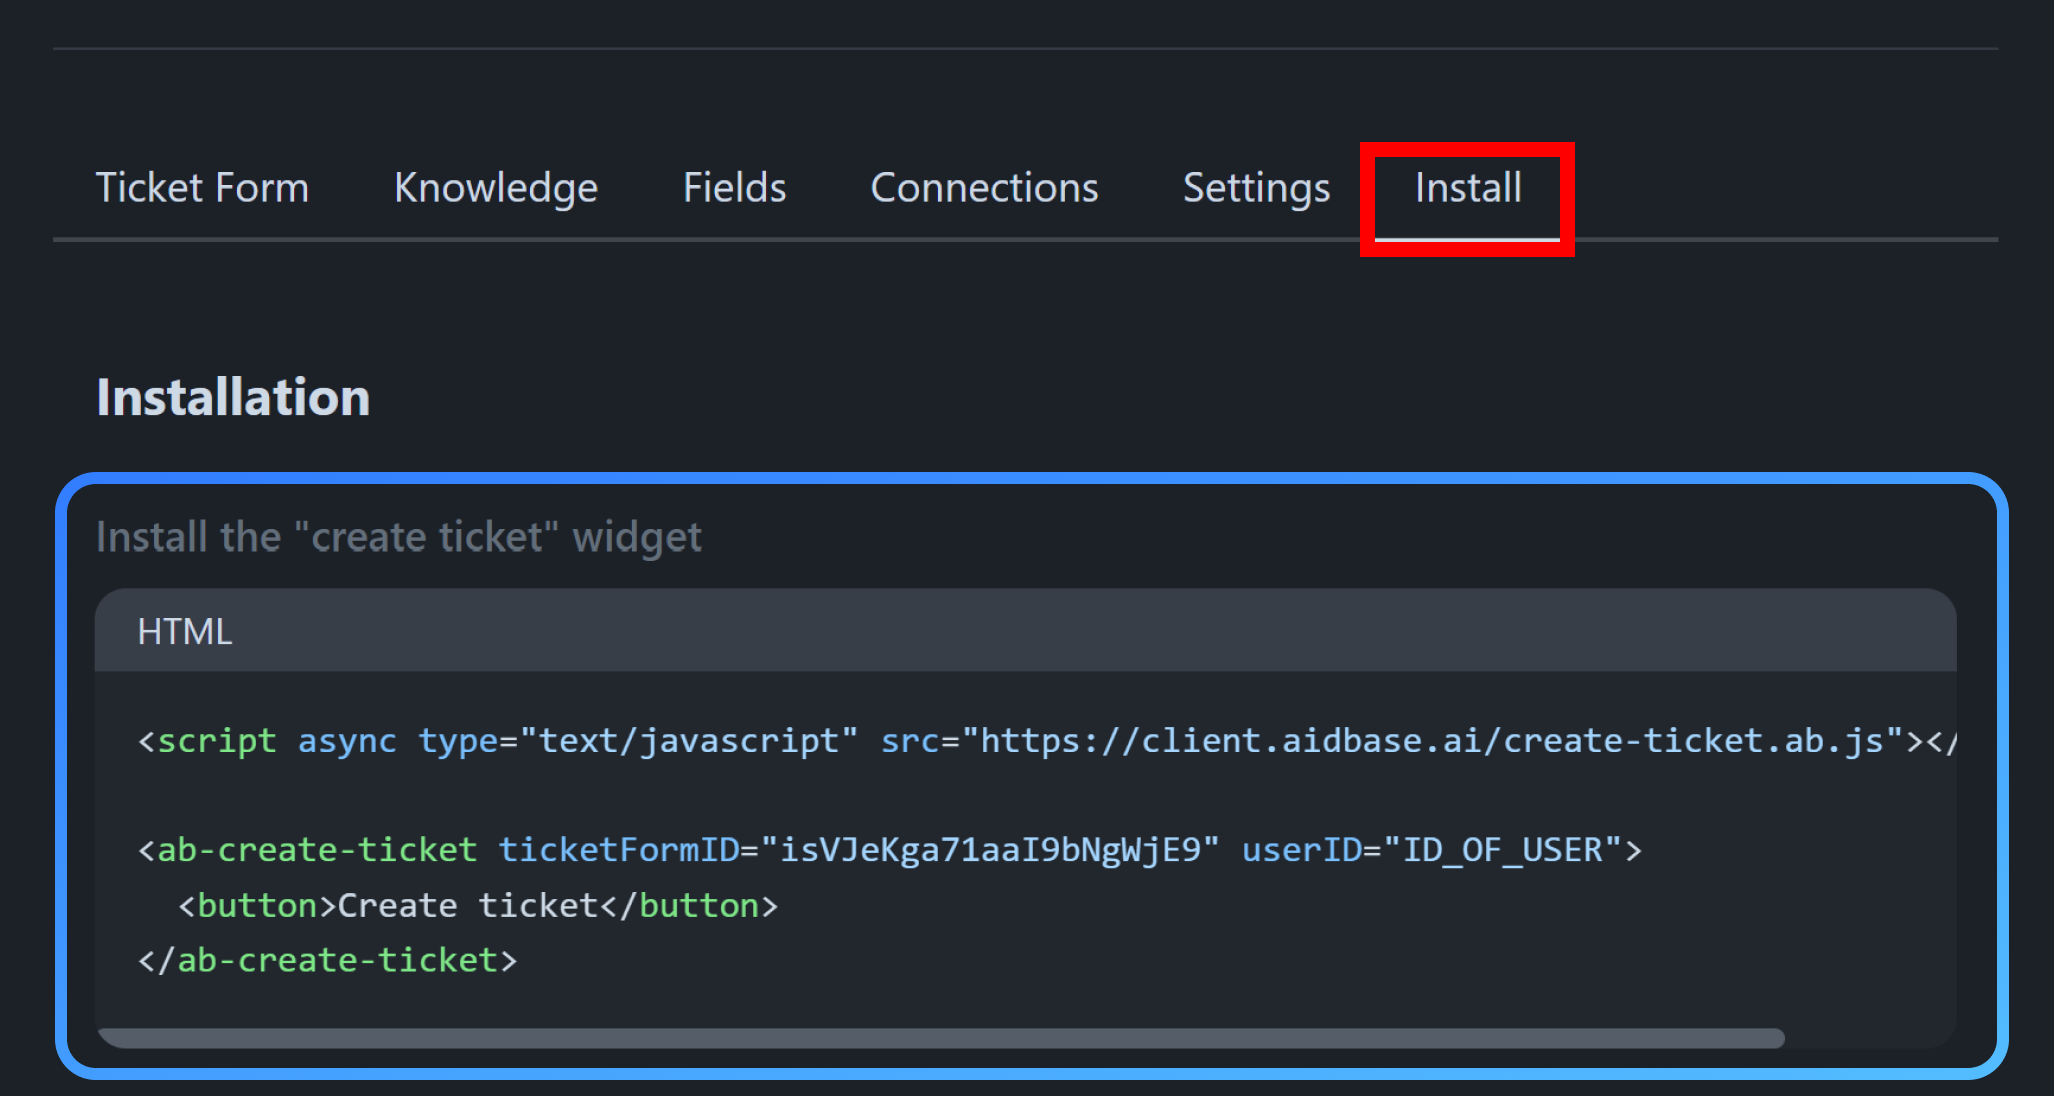
From here, you can see the installation script. For this guide, we are not going to copy it directly, but we will use it as a reference.
Install the Aidbase script
Let’s start by adding the script for the Aidbase ticket form. We will use the top part of the installation script above.
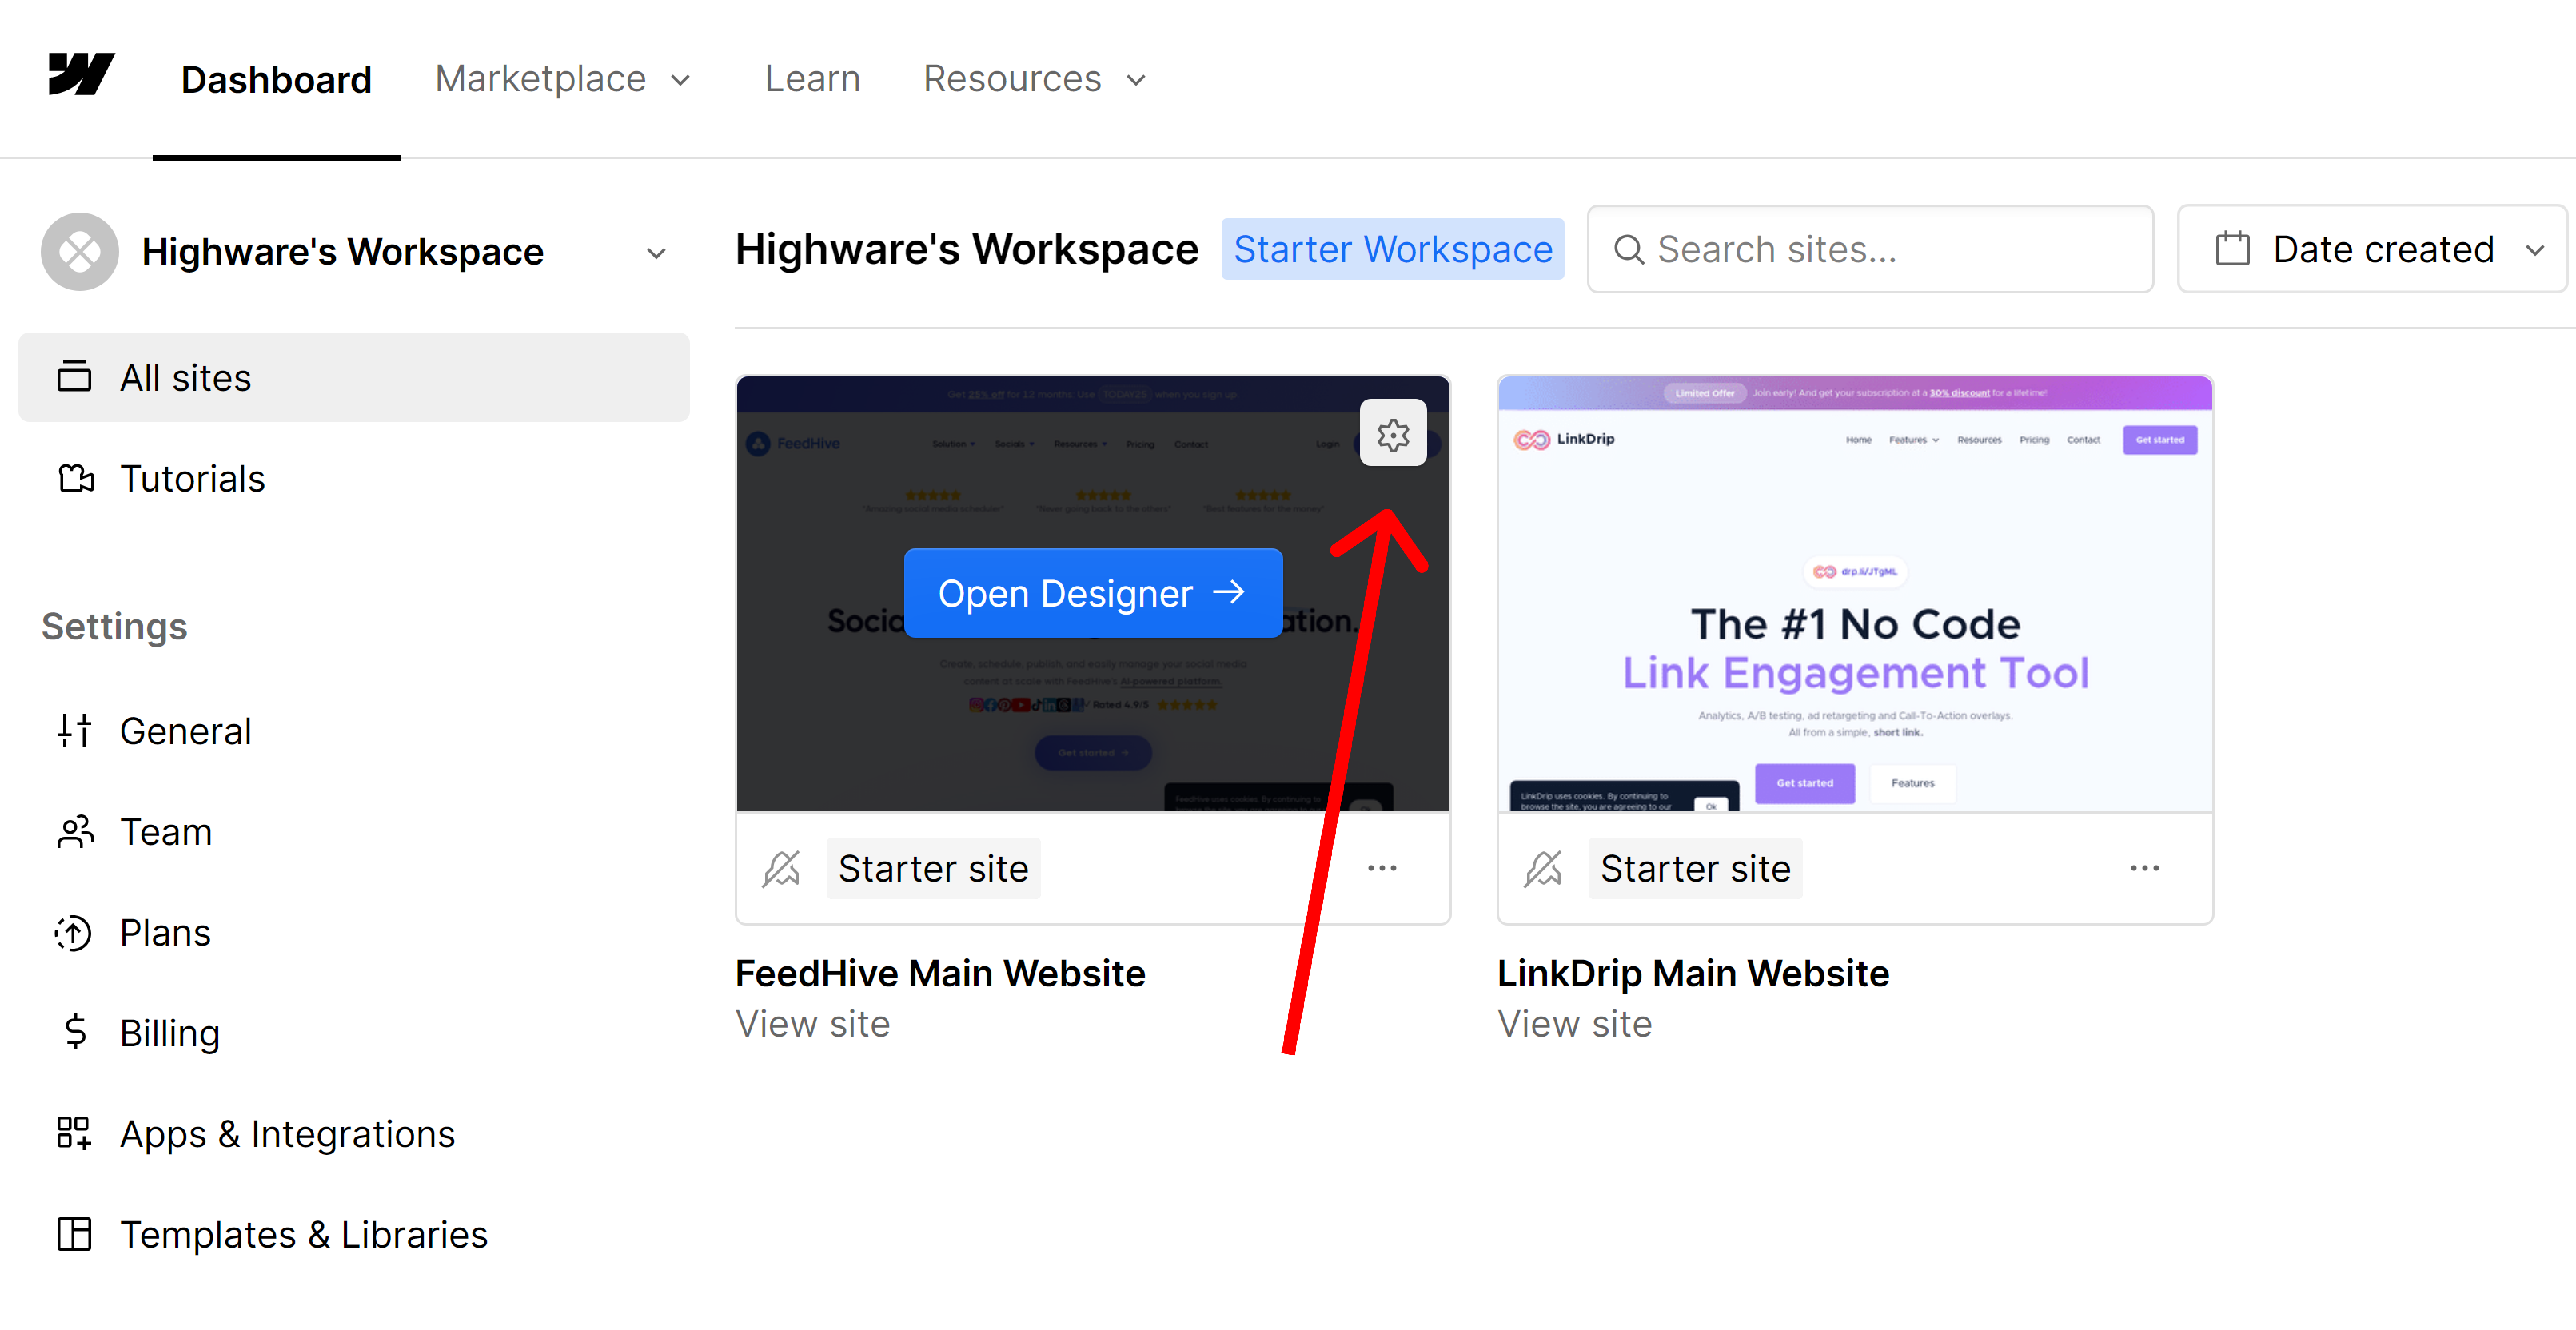
- Go to your Webflow dashboard.
- Hover on the website you want to install the chatbot on.
- Click the little “gear” icon on the top right.
Navigate to the Custom code area from the left menu.
Under the Head Code section, paste the script tag from the previous step into the editor.
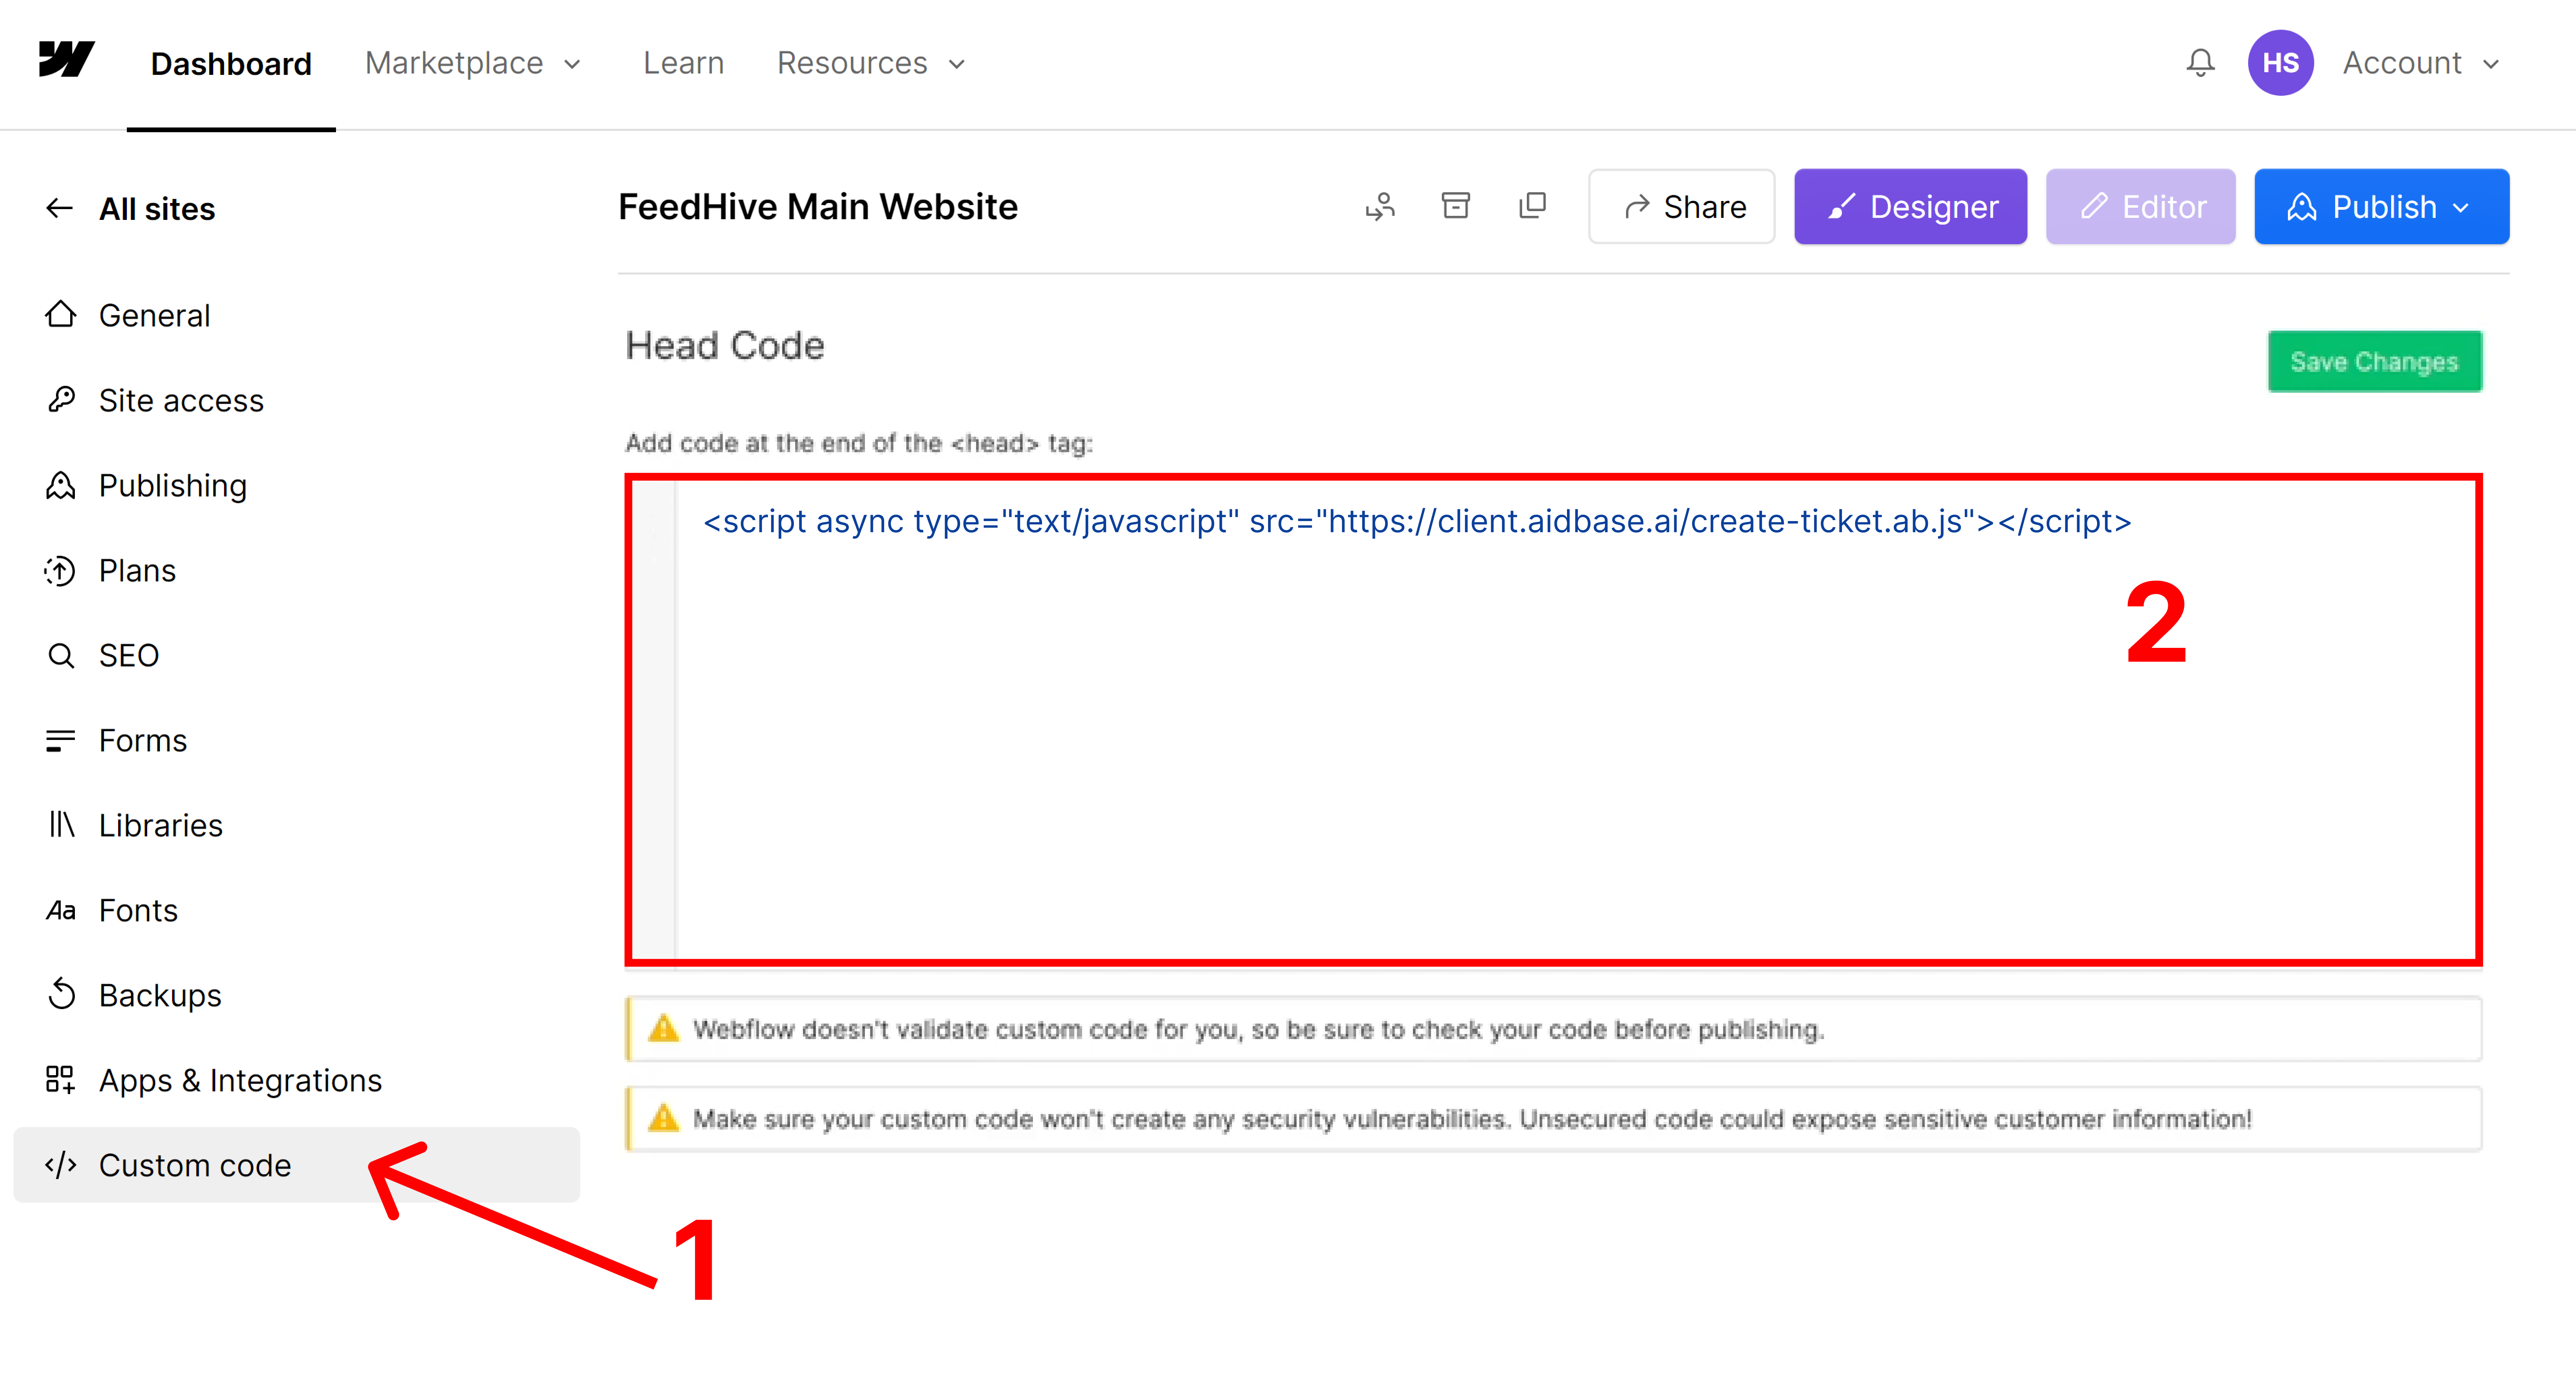
Finally, click the green Save Changes button and then click Publish.
Embed the ticket form
You typically want to install the ticket form on a contact page or support page.
For this, we need two things:
- A button that says “Create ticket”
- A ticket form that opens as a modal when the button is clicked.
Let’s take a look at how to do this:
- Go to your Webflow dashboard.
- Click the “Open designer” button.

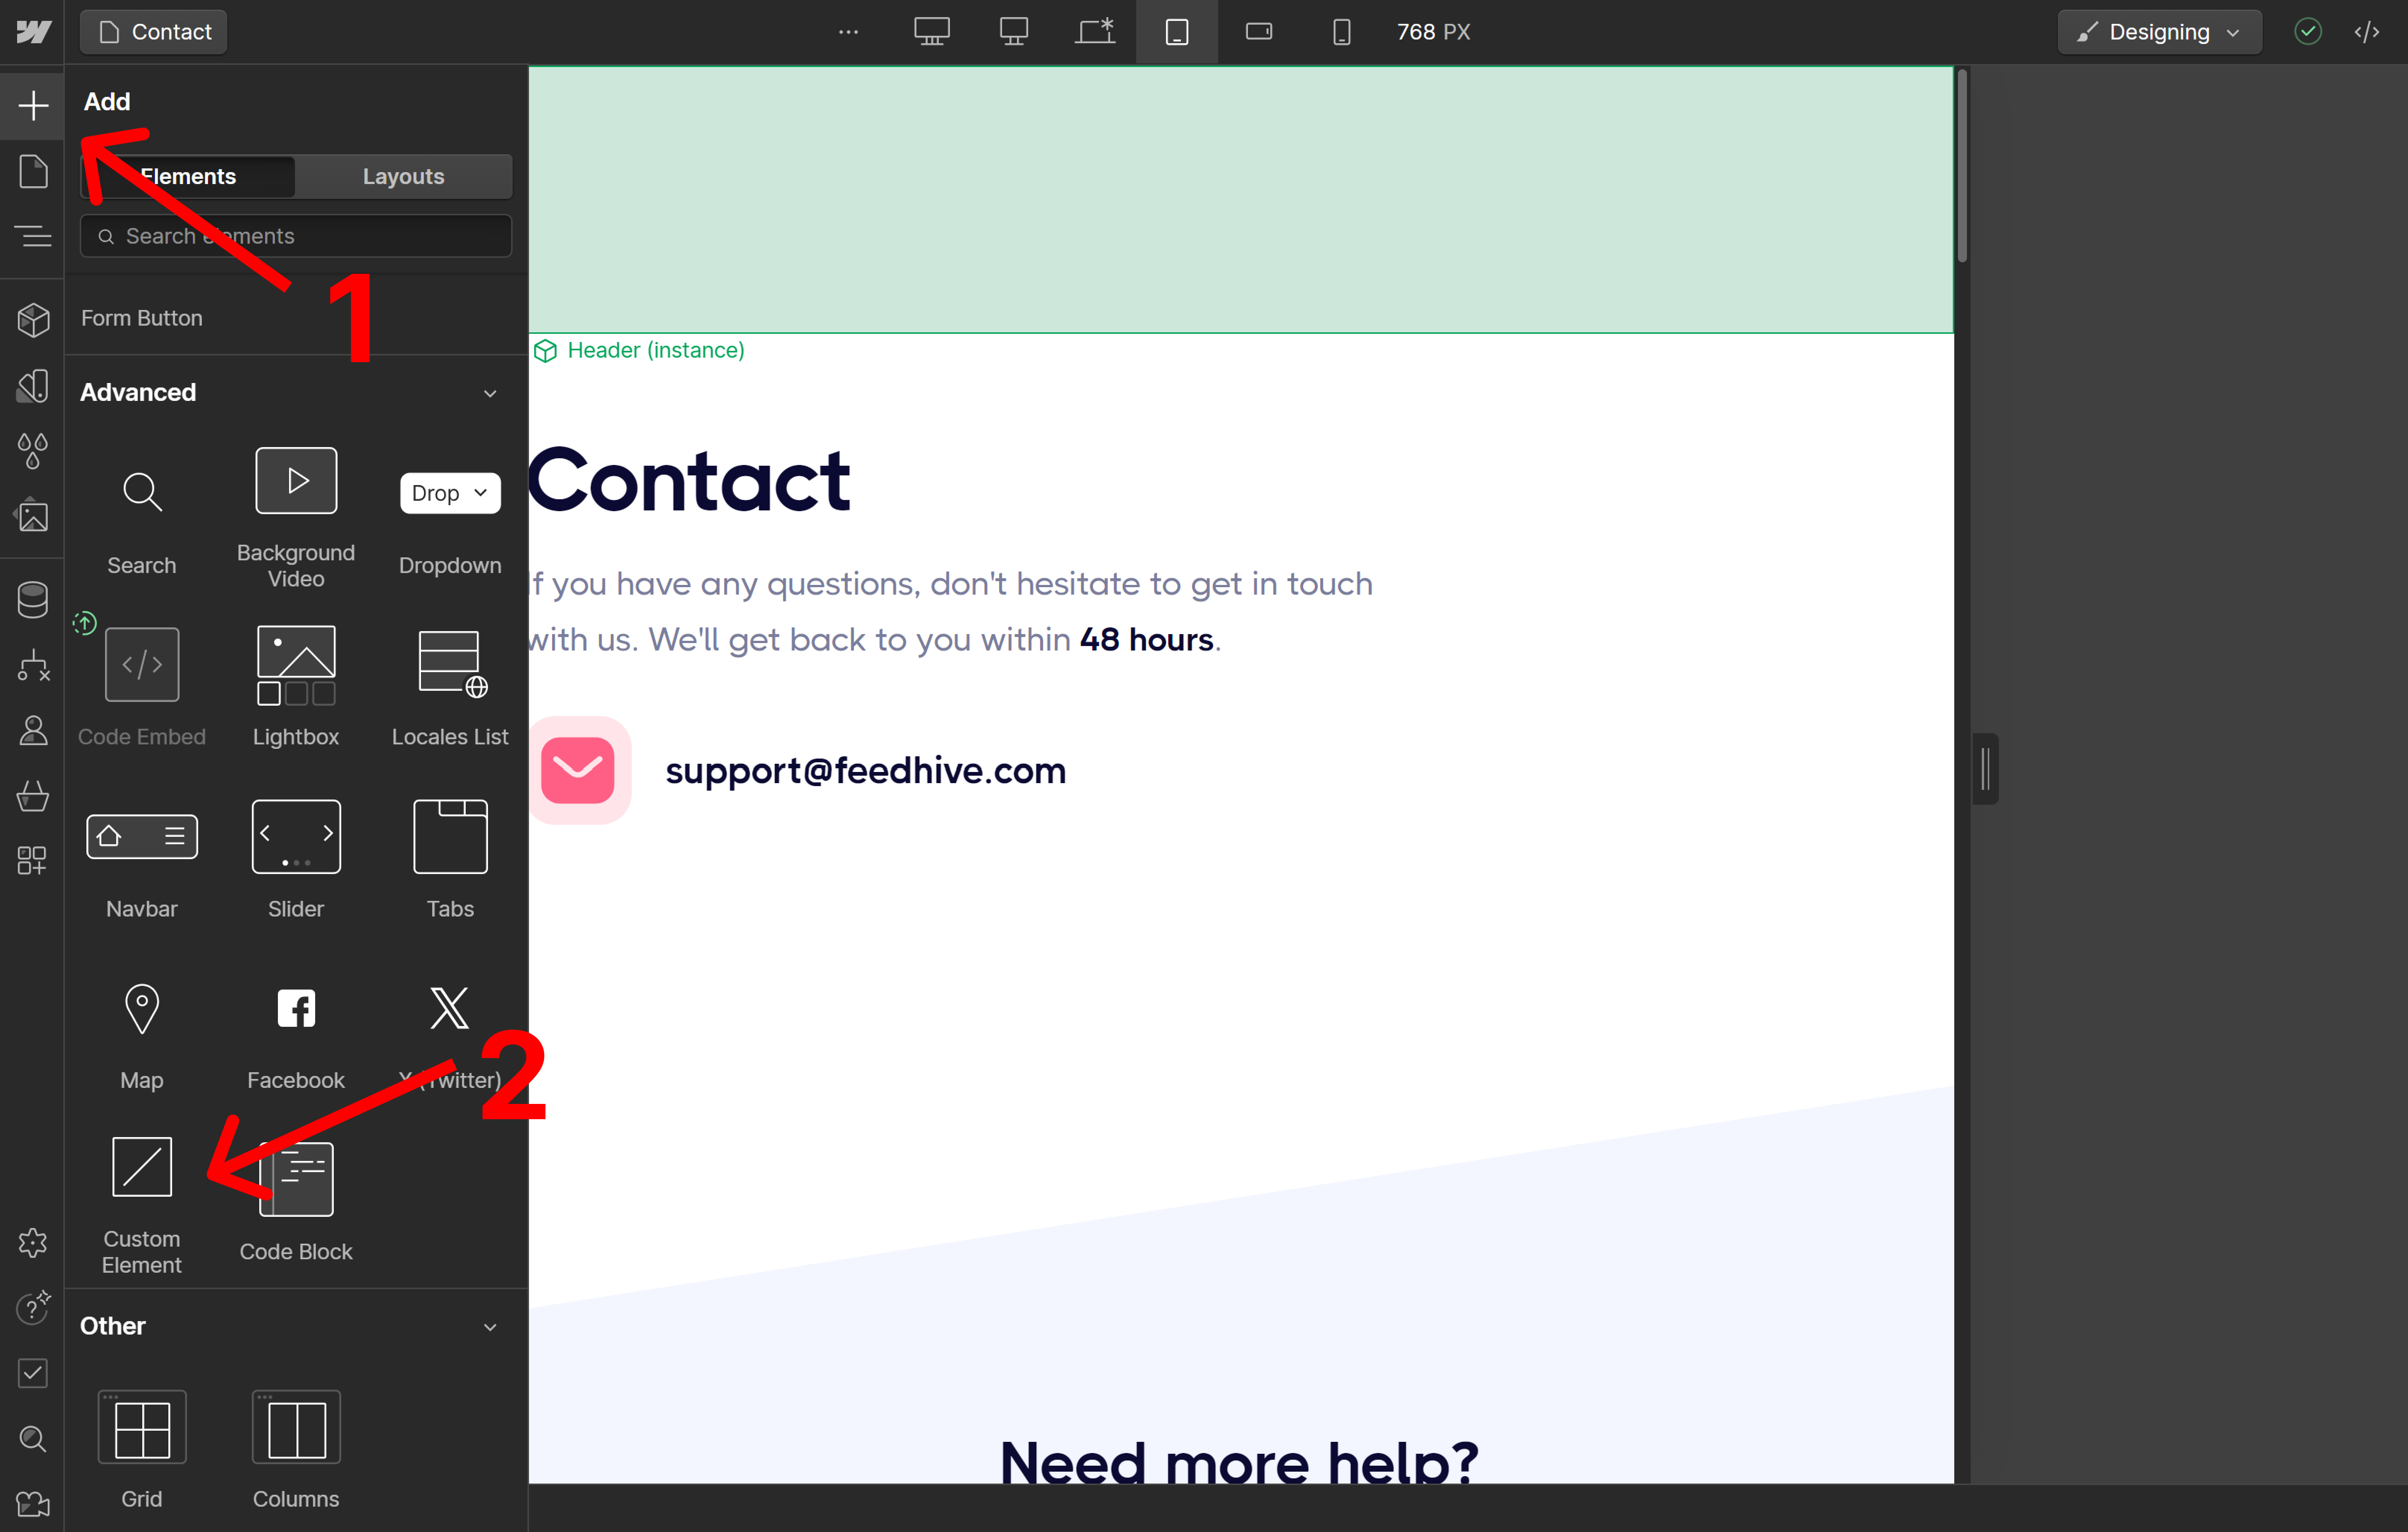
Now we are ready to add the ticket form element to our website.
- Click the “+” button from the top left menu in Webflow.
- Find the Custom Element under the Advanced section.
- Drag it into your Webflow site in the place where you want the ticket form button.
Next, let’s define the custom element, so Webflow recognizes it as an Aidbase Element.
- Make sure the custom element is selected.
- In the right side pane, under the Settings tab, put the name
ab-create-ticketunder Tag.
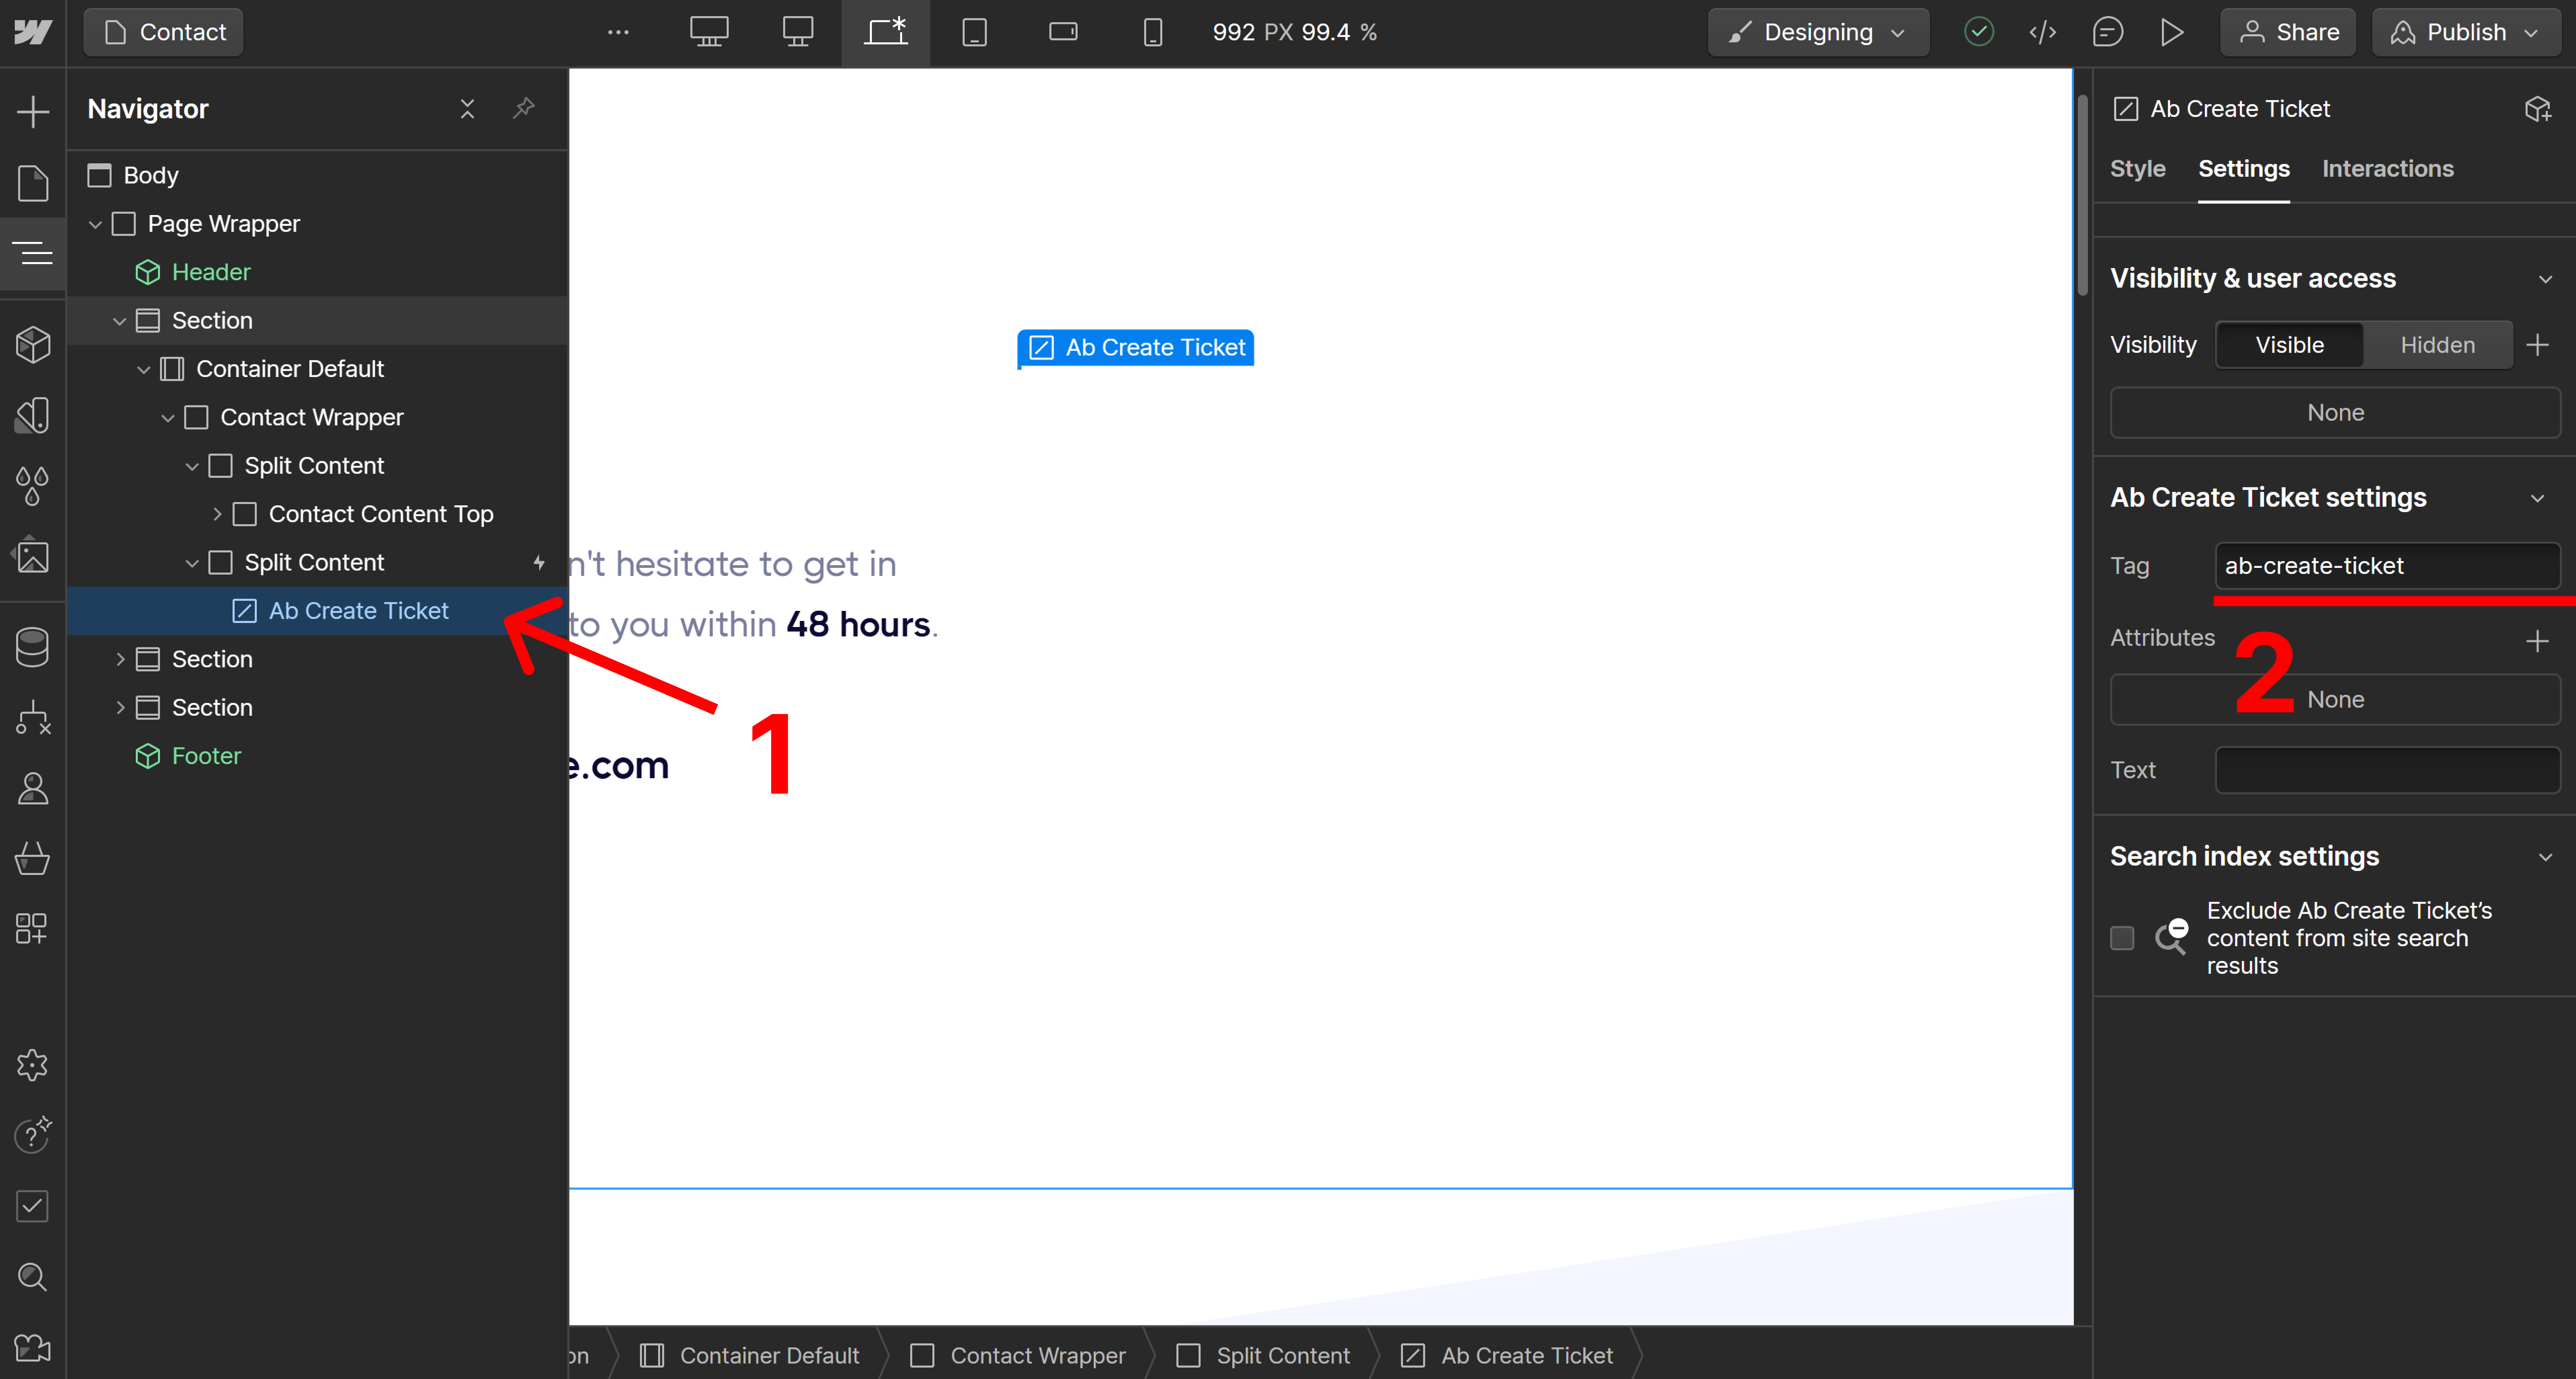
Perfect. Now we can start configuring the ticket form using attributes.
Just below the Tag section, you can click the small “+” button to add a new attribute.
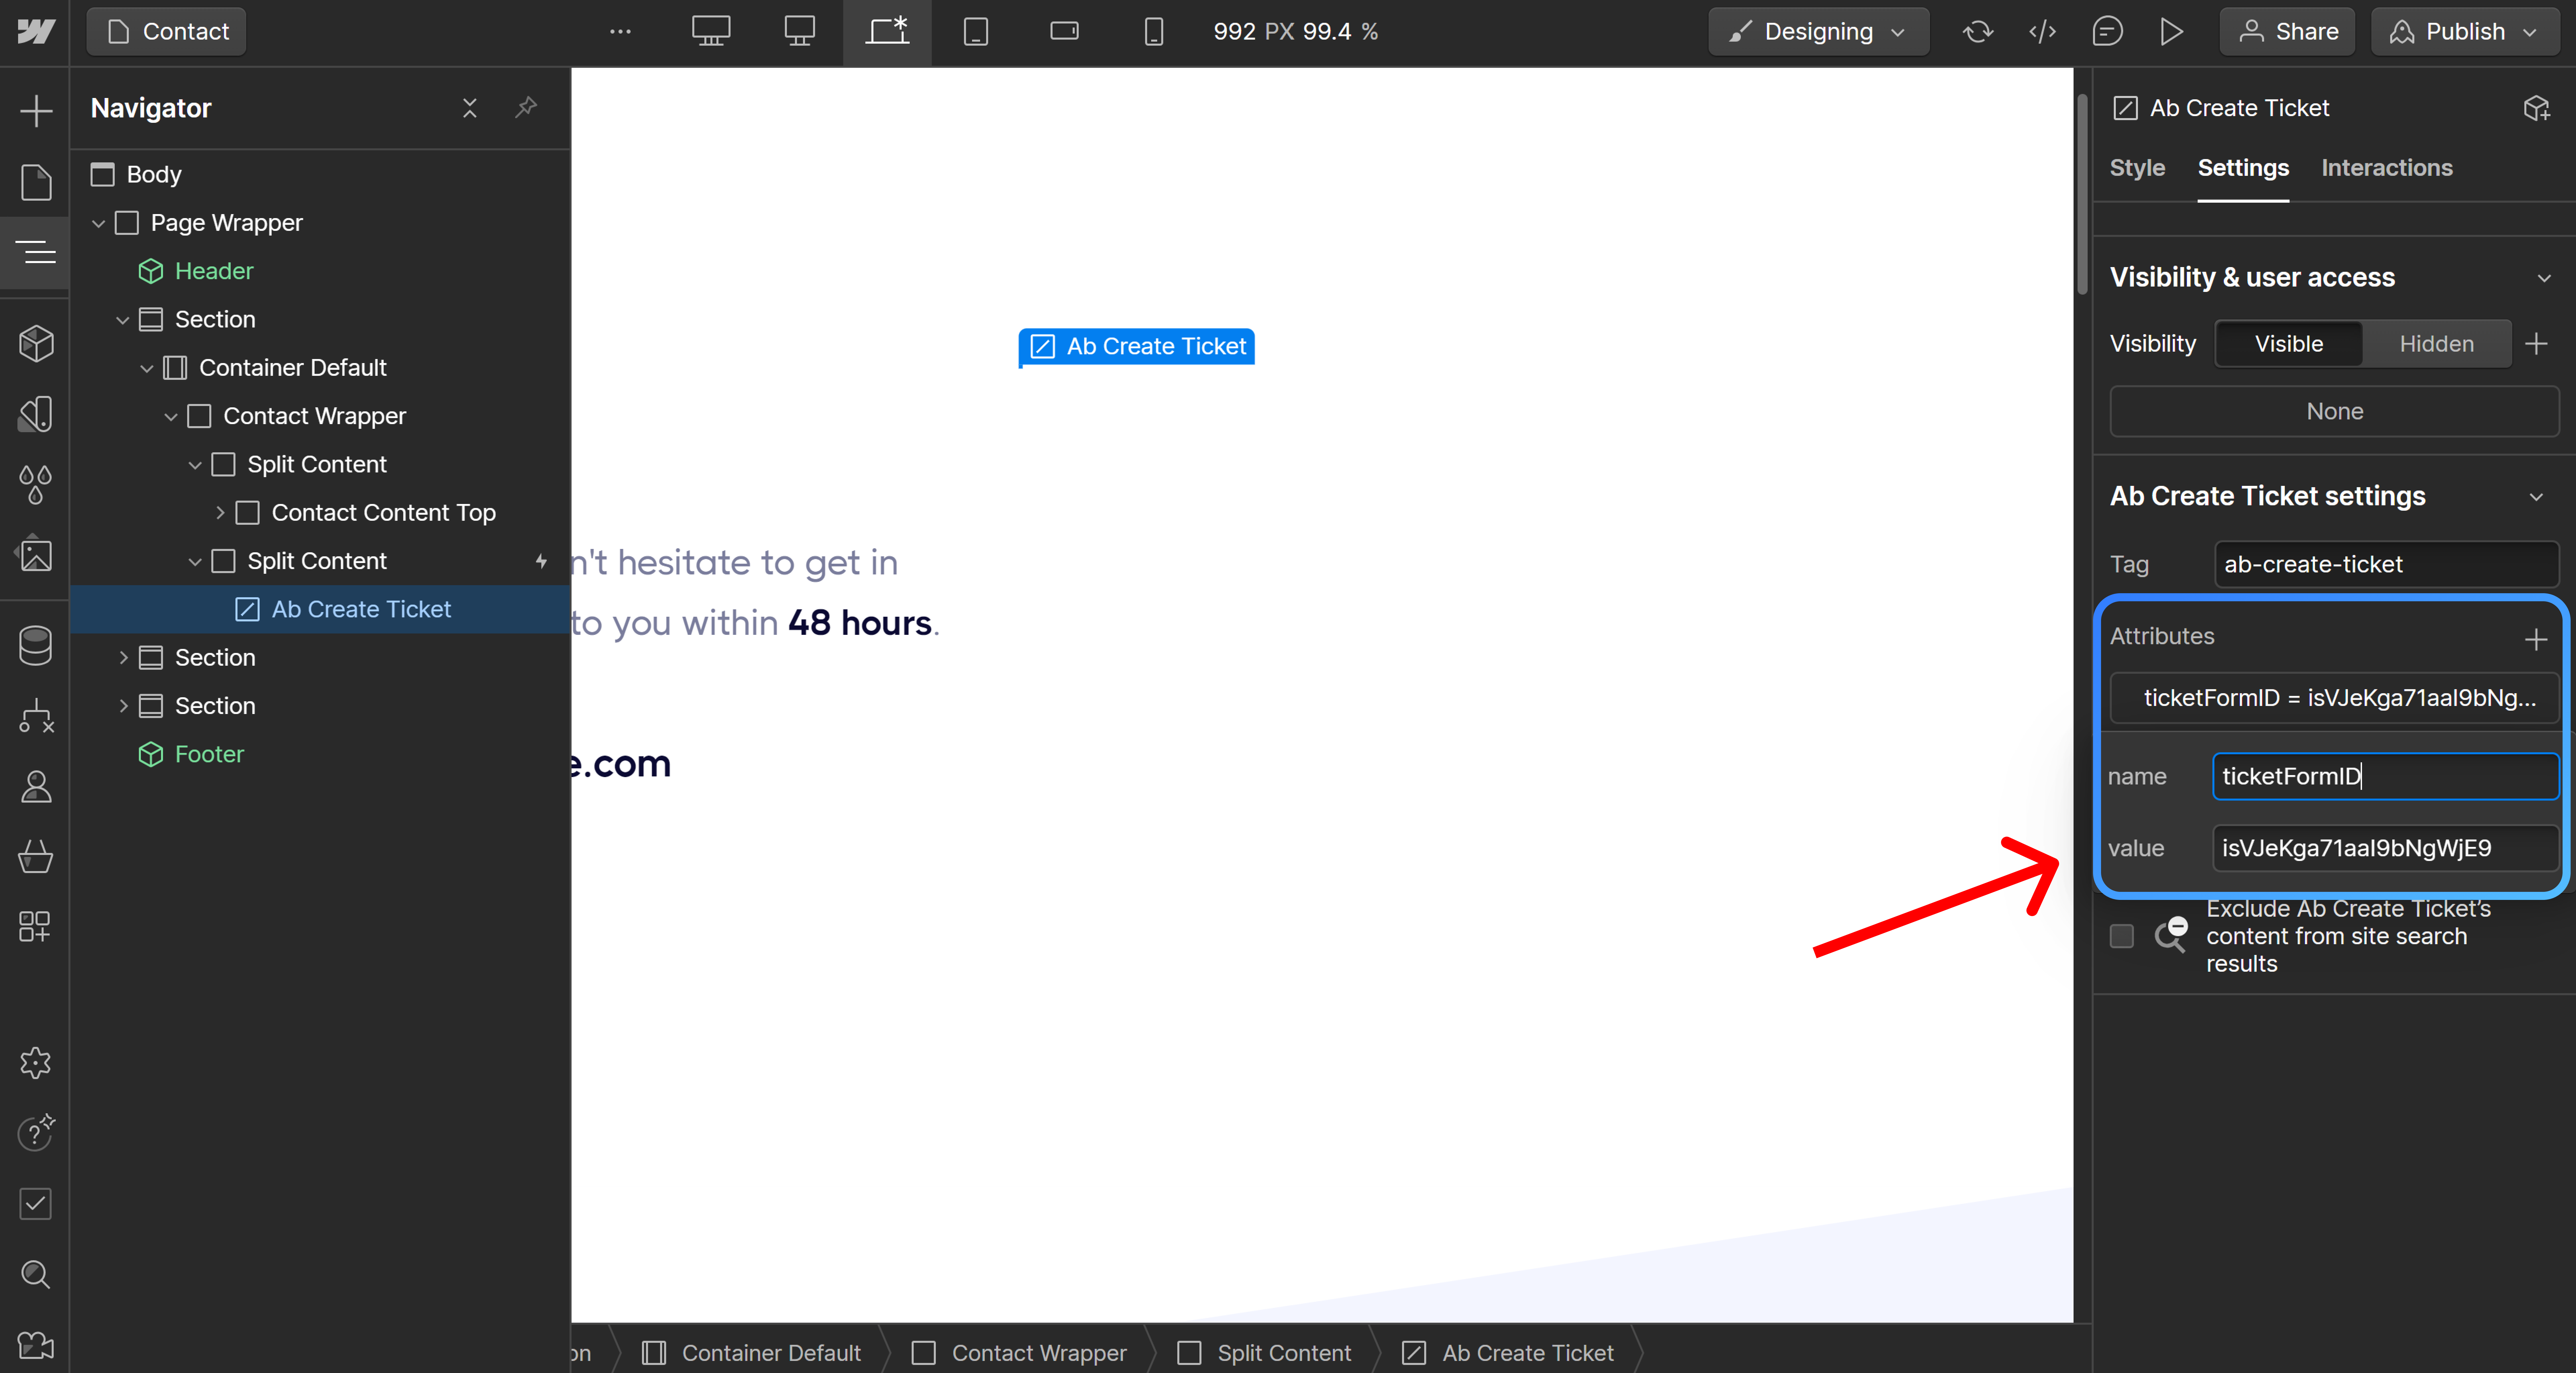
Add the ticketFormID from the installation script in the previous step.
You can add as any attributes as you need to customize the ticket forms behavior. See our reference guide for a full list of available attributes and a description of what they do.
Finally, we need to add a trigger that will open the ticket form when clicked.
Drag a button element (or any other element you wish) and put it inside the custom element.
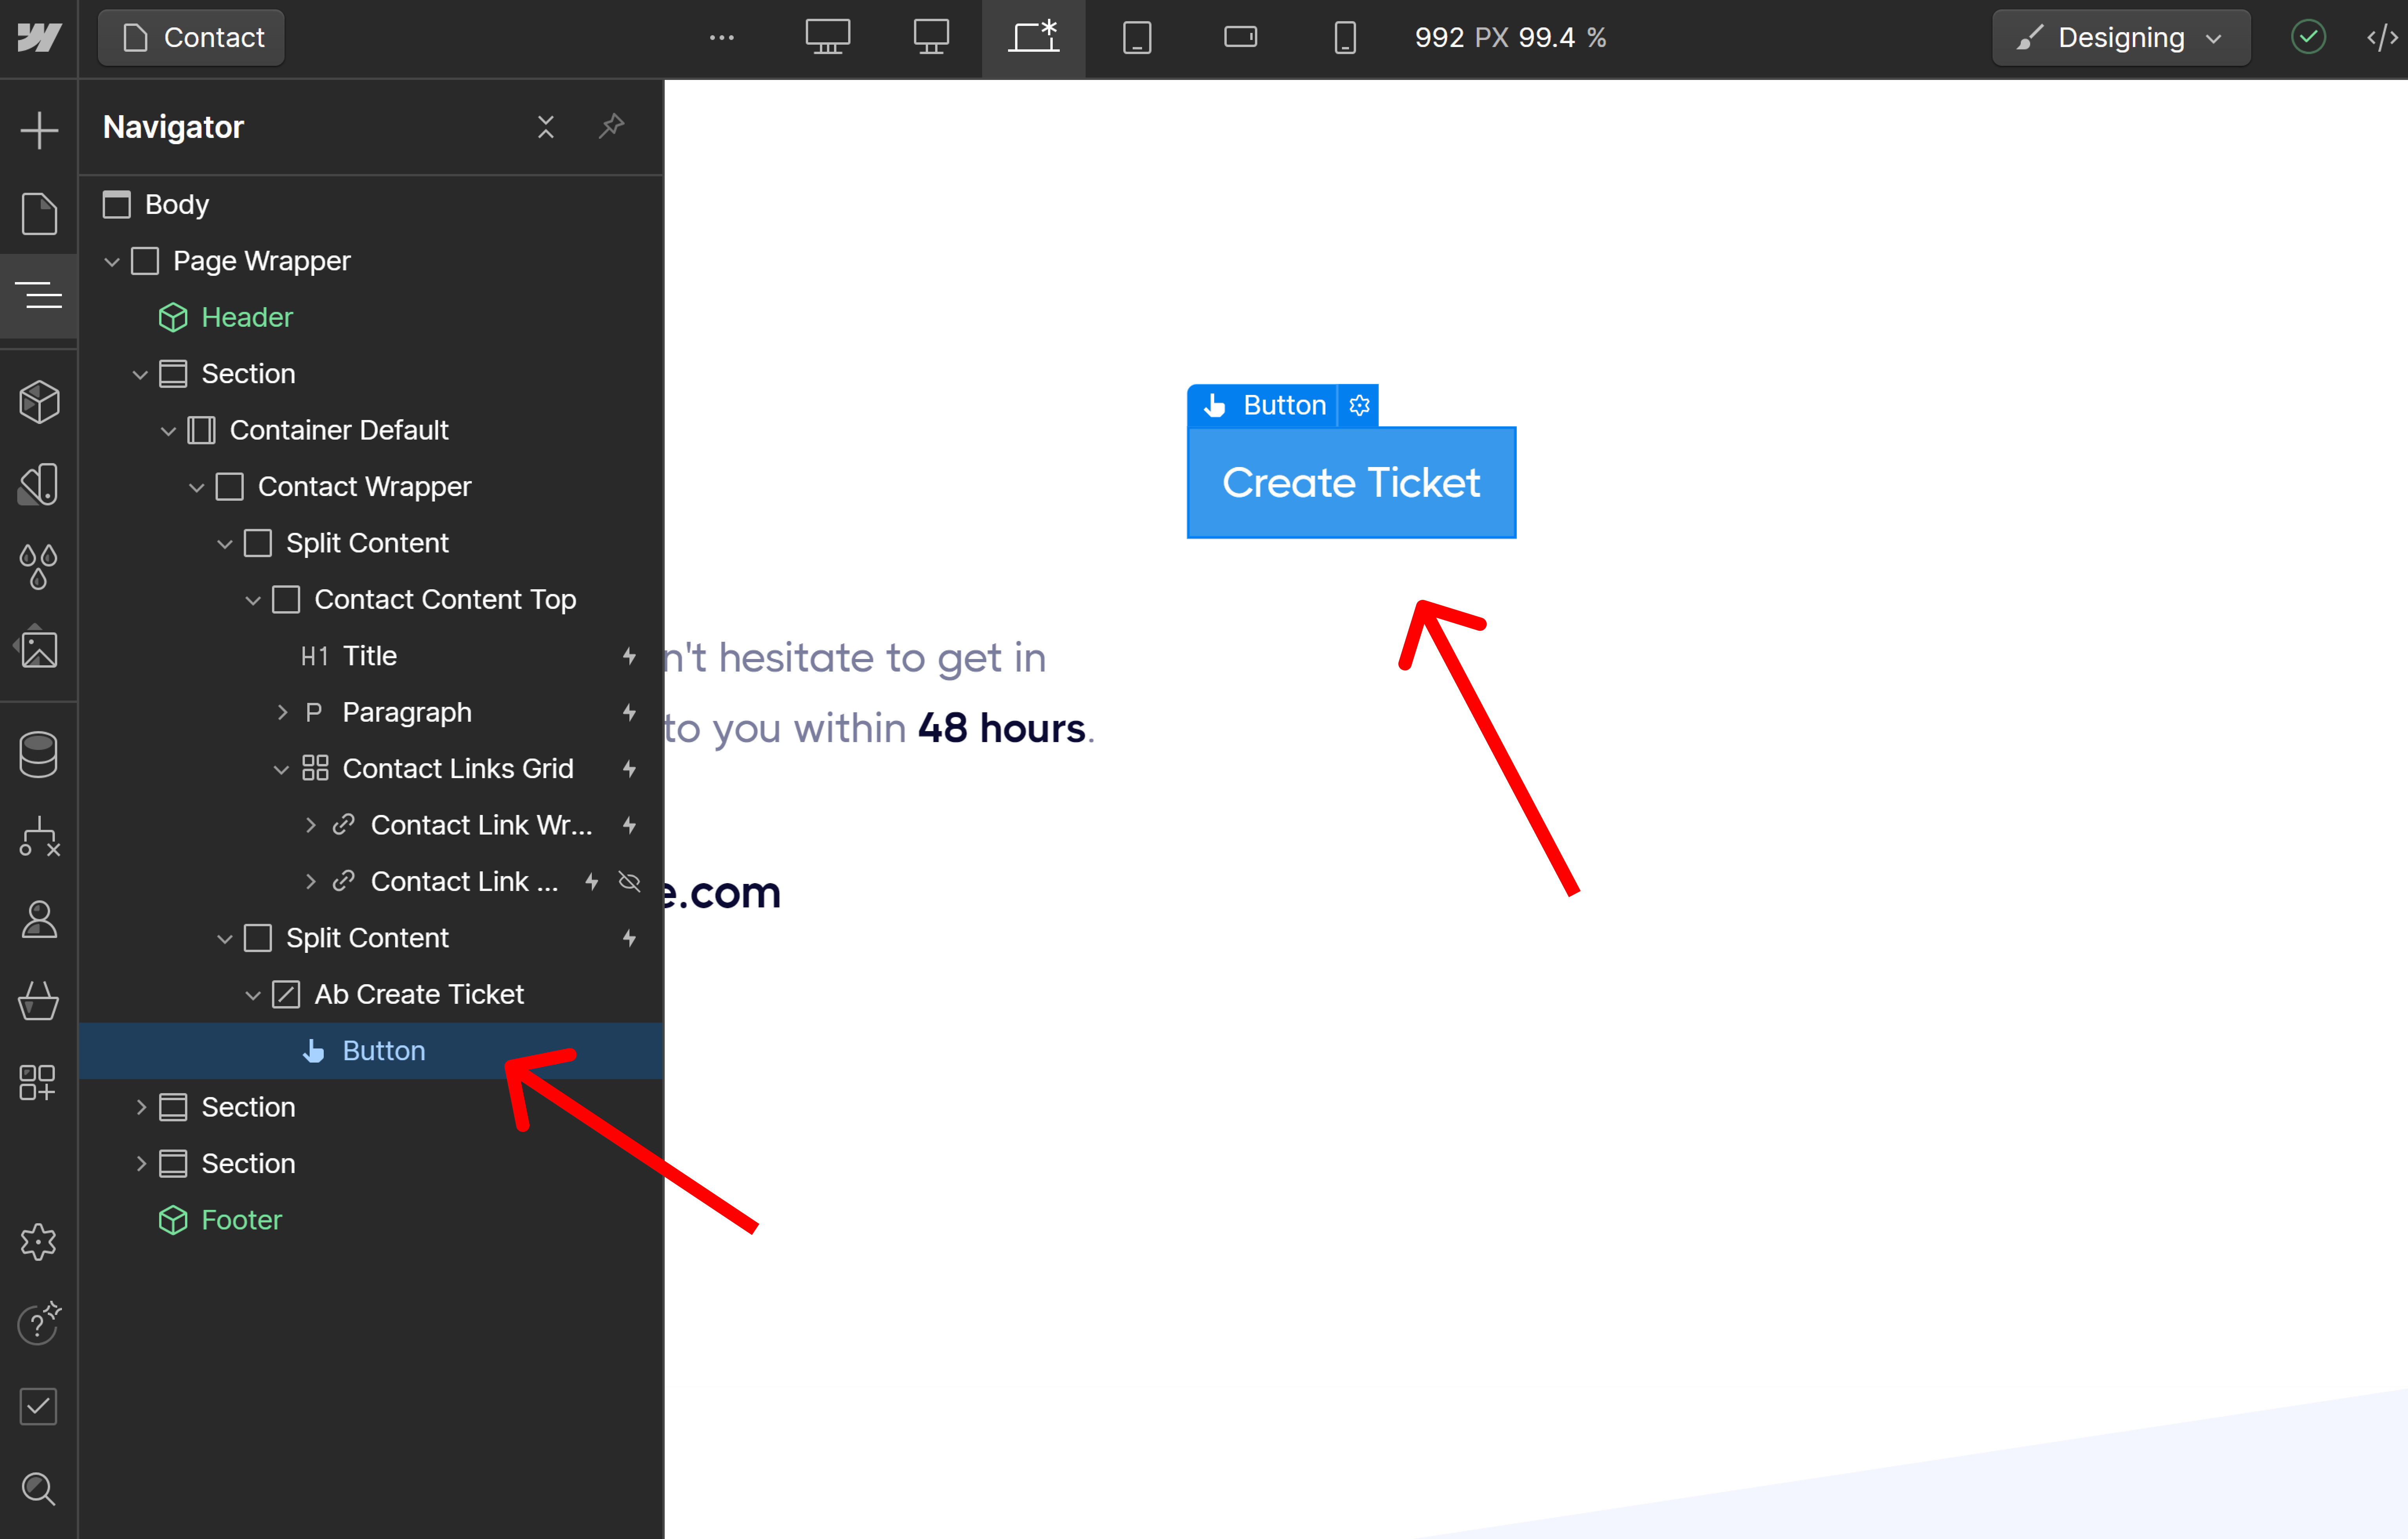
This button does not need to do anything.
As long as it is inside the ab-create-ticket element, Aidbase will automatically put an onClick trigger on it and make sure it opens the ticket form.
Finally, publish your Webflow site to see all the changes live.
That’s it! Your Aidbase ticket form is now fully integrated 🥳